As mentioned in “The Decision” we were caught out by the house selling quickly before we were prepared. and at the time of signing the contract had only just purchased the van from Hervey Bay Caravans and had yet to go and collect it, which Keith did on December 5, only 11 days before we had to leave the house. This didn’t provide any time to get anything ready or even remotely organised. Before leaving the house we had time to only put the kitchenware and bedding etc. from a first pick at what we had in the house. We spent the next 2 months at Olivia’s house in Oxley as she had space on teh front lawn for the van and a spare room for us so we had the van and jackaroo clear to work on. We also had all our surplus “stuff” after clearing the house which we had to finish sorting and packing or disposing of. So our preparations began.
While in the planning stage we had made a list of all possible extras and accessories armed with information gathered from Magazines, Caravan Shows and especially eBay which is a mine of information if you don’t get too carried away! All these items had been compiled into a Spreadsheet so that we could track how much we spent as we went along. The target was to spend no more than $10k on everything, which was basically going to give us a complete rig for not much more than $50k. As of writing this in late April we have just about exhausted our list and stayed within budget.
Some tasks carried out are mentioned in individual posts and updated here from time to time.
Onboard Storage for Tools and Spares etc.
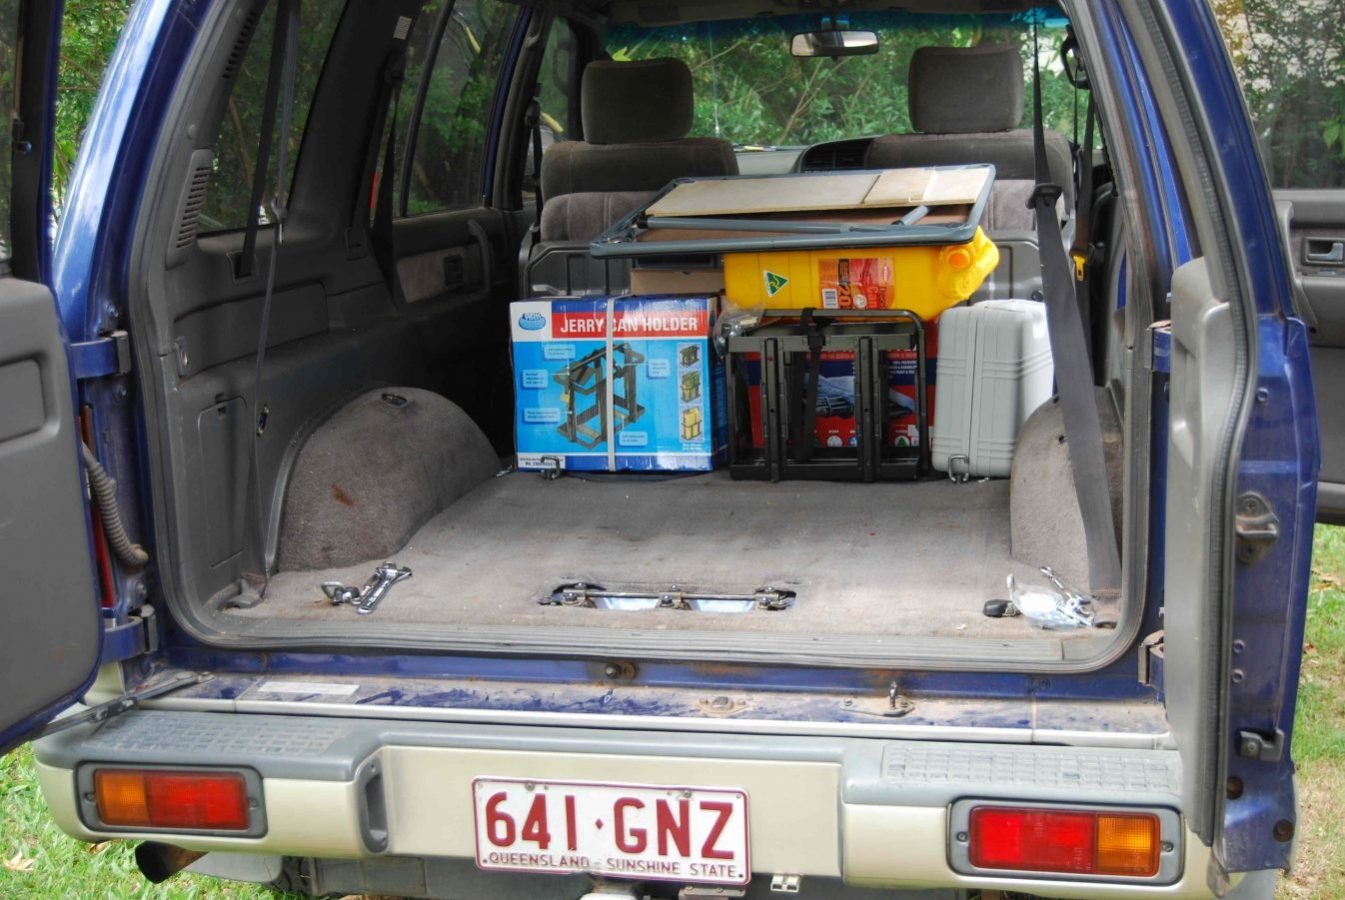
Deciding to tackle the Jackaroo first I had already planned to make a storage unit to take up the whole of the rear area behind the second row seat, which meant removing the third row folding seats completely, shown here removed with the second seat folded forward for easier access:
This area is around 900mm long by almost 1300mm wide above the wheel arches.

Fortunately we had room under Olivia’s veranda to set up a workbench with cutoff wheel drop saw and vice to make it easier to manufacture the unit.
The frame is made out of 25x25x1.2mm aluminium using the knock in plastic connectors for the joins; while you can buy all of this at Bunnings I went to Ullrich Aluminium and bought the tubing, some angle and all the connectors at less than half the cost (I still had my courier ute so could carry the 6 metre lengths of tubing etc. on the racks)
The frame is made in sections which uses a bit more material but means it is easier to modify the unit in future if I need to, especially to change the side “pods” if needed. Here is the frame mostly made and test fitted in place:

The necessary side and top panels were cut from 9mm plywood (which did come from Bunnings) all held in place with self tapping screws, and covered in black ribbed car carpet (also from Bunnings). This was attached using spray adhesive.

Here the panels are being test fitted and then laid out on the carpet being glued in place before trimming.

Here the unit is almost finished and ready for the baskets and fridge slide:

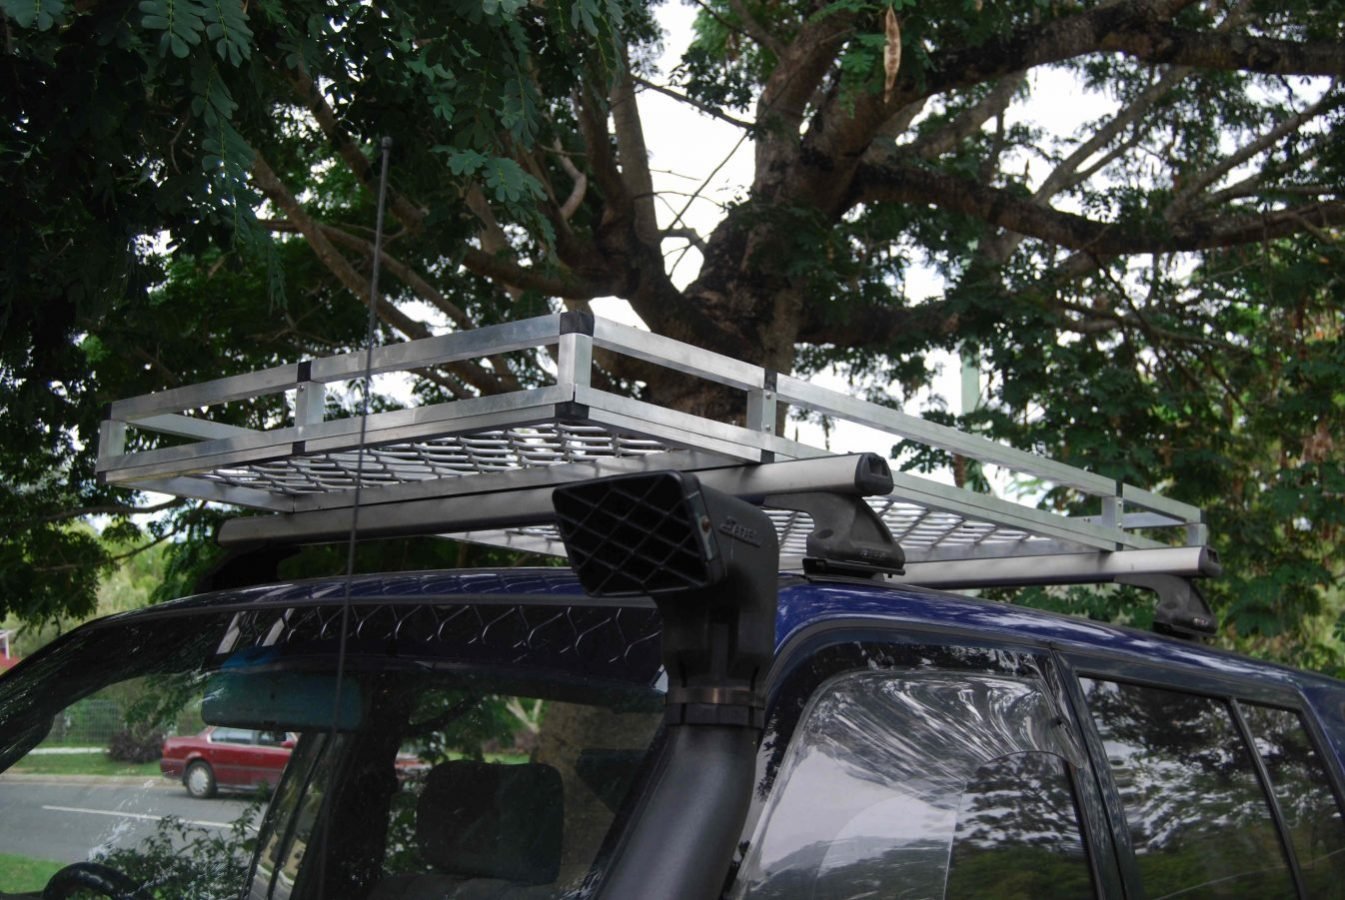
While making this unit I decided to make a basket for the roof bars from the same materials and bought a piece of security door expanded mesh for about $65 whcih provided the base for this basket as well as a small basket on the caravan a-frame behind the gas bottles. See later photos.
Other Jackaroo Changes:
As the vehicle came with most desired extras such as CB and Brake controller it was more a case of tidying up, especially in the driver’s area so this was left until later and the time spent on add-ons as a first preference, the main one of these was a rear camera system for both units. On the Jackaroo this is primarily for hooking up as the van has a large towball weight (200kg+) and so is very difficult to move into position if you back up in the wrong place; it also saves a lot of angst over someone else directing the process!

After looking at various solutions it was obvious that a mirror monitor was a better solution rather than adding yet another screen into the dashboard area. The unit bought through eBay comprises a dual screen mirror which clips firmly over the existing rear view mirror and cables down to below the dash, displaying each camera ona separate screen. The mirror/monitor is wired so that it is only powered when ignition is on.
The rear camera on the Jackaroo is installed to come on only when in reverse and uses the lefthand screen. The cabling seen here is concealed behind the bumper bar with the transmitter unit; the camera is connected to the right hand reversing light.

A Jerry Can holder,was,added to the right hand door for extra diesel when needed, including for a diesel heater to be fitted in the van.

The rear camera on the van is designed to see the road behind when travelling and is setup to appear in the right hand screen. A switch is fitted inside the caravan to turn this camera on/off. Both cameras are wireless but the caravan camera needed the transmitter moving forward to get continuous reception when travelling.
Having finished some basic add-on work to the van the driver’s area was next to be tidied up as the CB was mounted below the dash in front of the driver’s right shin and not very easy to get to and operate; also it was wired to operate only with ignition on which seems to defeat the object of any emergency calls if you are broken down? In addition the radio/cd player was out of action with non working buttons so we had a spare Sony unit from one of Frances’ earlier courier vehicles.
The end result is the “new” radio/cd mounted in place of the original unit and the CB mounted in the DIN space below, previously one of those open front “bins” but it included the mounting rails and clips for the CB so was very easy to fit. Above the air vents is the TomTom 540XL GPS and a Innotech Tyre Monitoring Receiver for which we have sensors on all 8 tyres of the Jackaroo and Van.

Behind the auto shift levers, where there was a four bank switch blank, we have fitted a dual socket which has 1 x Dual USB socket and 1 x standard cig. socket. To the left is a master switch for this socket and the CB so these can be on at any time. The Electric brake Controller can be seen to the left of the Steering Wheel under the dash where it was originally mounted.
Caravan Add-Ons and Changes:
As above a rear view camera was the first item added and the transmitter was eventually moved to the under seat area (side lounge) to get adequate range to the receivers under the Jackaroo dash (below glove box).
While finishing the storage unit and roof basket we also wanted to make some use of the space behind the gas bottles and below the front boot and had enough materials left to make a small basket for here. As it turned out, when we bought a set of awning walls (no not an annexe, see later) we needed a tube to store the flap extenders so this was put here as well.
While working on thew outside of the van I also fixed my “old” ute toolbox and a Jerry Can holder to the existing rear bumper:


The van had all the basic facilities we were looking for but a few items have been added for comfort and convenience and a few small changes made. Most of this has been electrical related in one way or another; as purchased the van had a single battery which looked fairly new but had no meaningful labelling to determine it’s exact status, there is also a single Solar Panel fitted to the roof on the rear right, we thought this was a 80 watt unit but from it’s output it seems to be a 60 watt and is obviously a few years old. This is connected to a 10 amp solar controller with the output in parallel to the 240v charger onto the battery. Our Jackaroo had a Anderson Plug already fitted but the van had no facility for vehicle charging so this was on the list to be added. There were also errors showing up on both the mains charger and the Solar controller with both operating in parallel so this need investigating and fixing.
We had no idea how the system would cope with free camping away from power etc. and on our first experience the power ran out just before two days, less than we expected with what should have been at least a 100AH battery with some solar top up plus short travelling each of the two days. The second time around the system barely made one night so there was obviously a problem. The good news in this experience was that our on board water supply (140 litres) was obviously good for at least 4 days even with brief morning showers; the toilet seemed to have the capacity for at least 3-4 days of constant use. Read our early posts for these experiences.
Other features we wanted was a Diesel Heater for free camping in the cooler times, more solar and some additional 12 volt facilities inside the van; we also had to buy a TV as the van was not fitted with one and had no wall bracket or 12 volt supply for this. We had the dealer at Hervey Bay fit a Digital Jack antenna which does give you a single 12v cig. socket as well as the antenna outlet. In retrospect I would not use this antenna again as it has very mediocre performance and we have already added an additional signal booster to improve it (which it does) although we are yet to determine if the antenna actually has a fault as it has the characteristics at times of having a bad or “dry” joint somewhere in the connections.
Most of the worl to the van was done during the first few months of travel and is mentioned in the various posts.