November 27, 2023
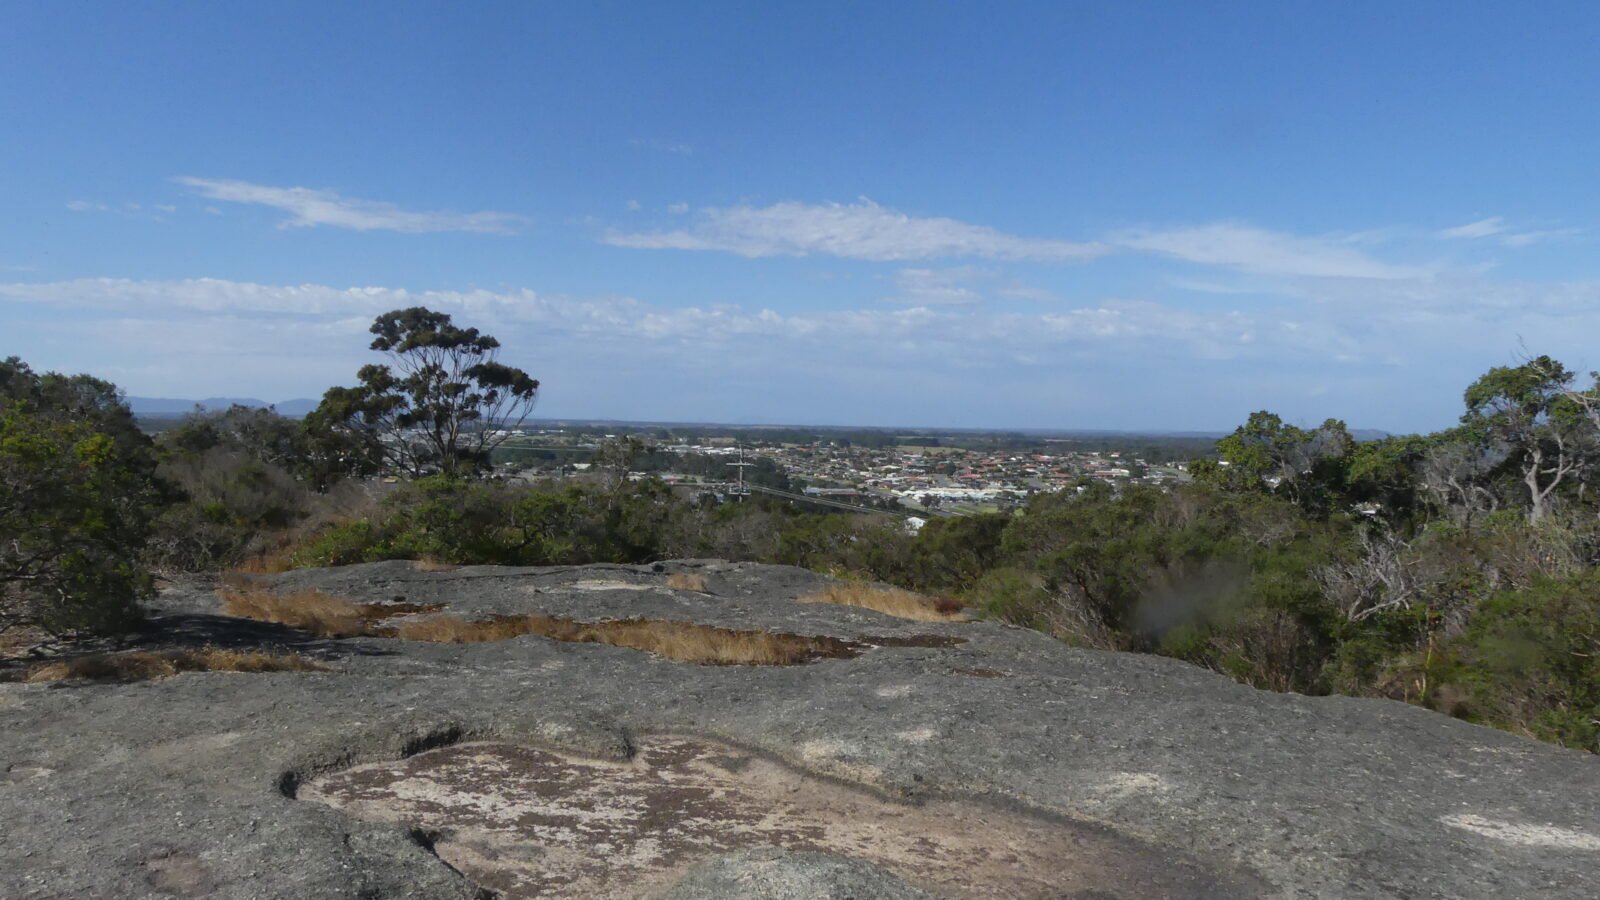
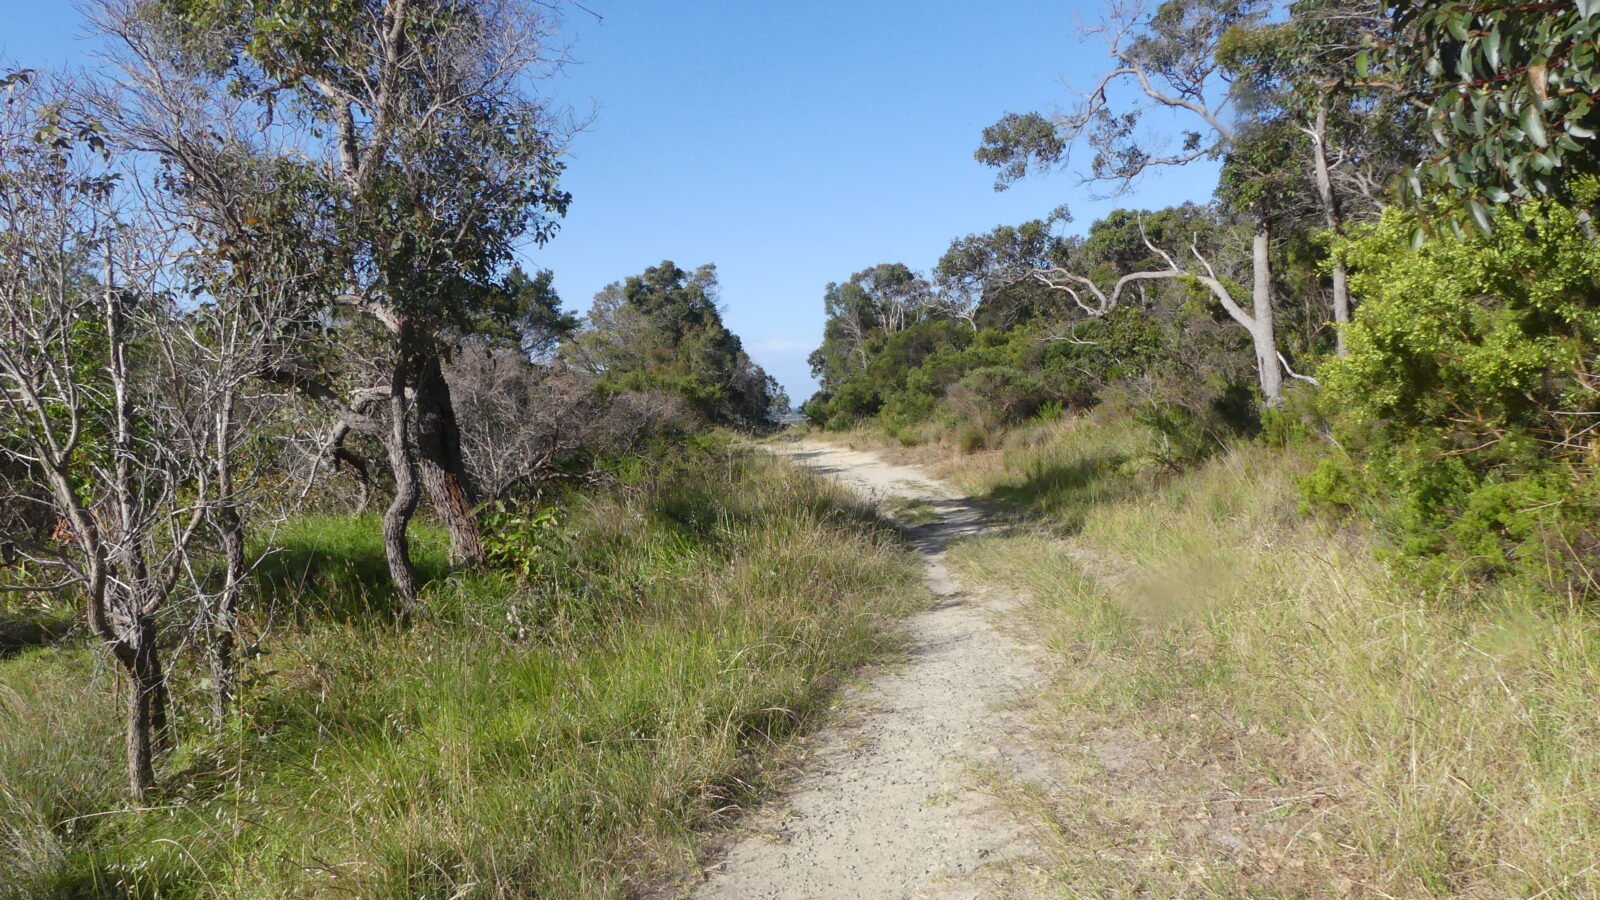
By some coincidence, the caravan park we had chosen is opposite Mt Melville which rises to 152m above the town and has a circular walking trail with a few choices of side tracks and alternate routes. An access into the walks is only 500m from the caravan park but does include a rather steep roadway! However, once reaching that, the walking so far has been very easy. We took a short half loop for our first look after arriving on the Monday, covering about 3.6km
![](https://alloveraustralia.com/wp-content/uploads/2023/11/Mount-Melville-North-Walk-001-P1100720-1600x900.jpg)
The main circular walk officially starts from a parking area at the North end of the reserve (Serpentine Road on the map) so we walked towards that and halfway down the Western side to return across the centre; later we will do the whole circuit or the other half at least.
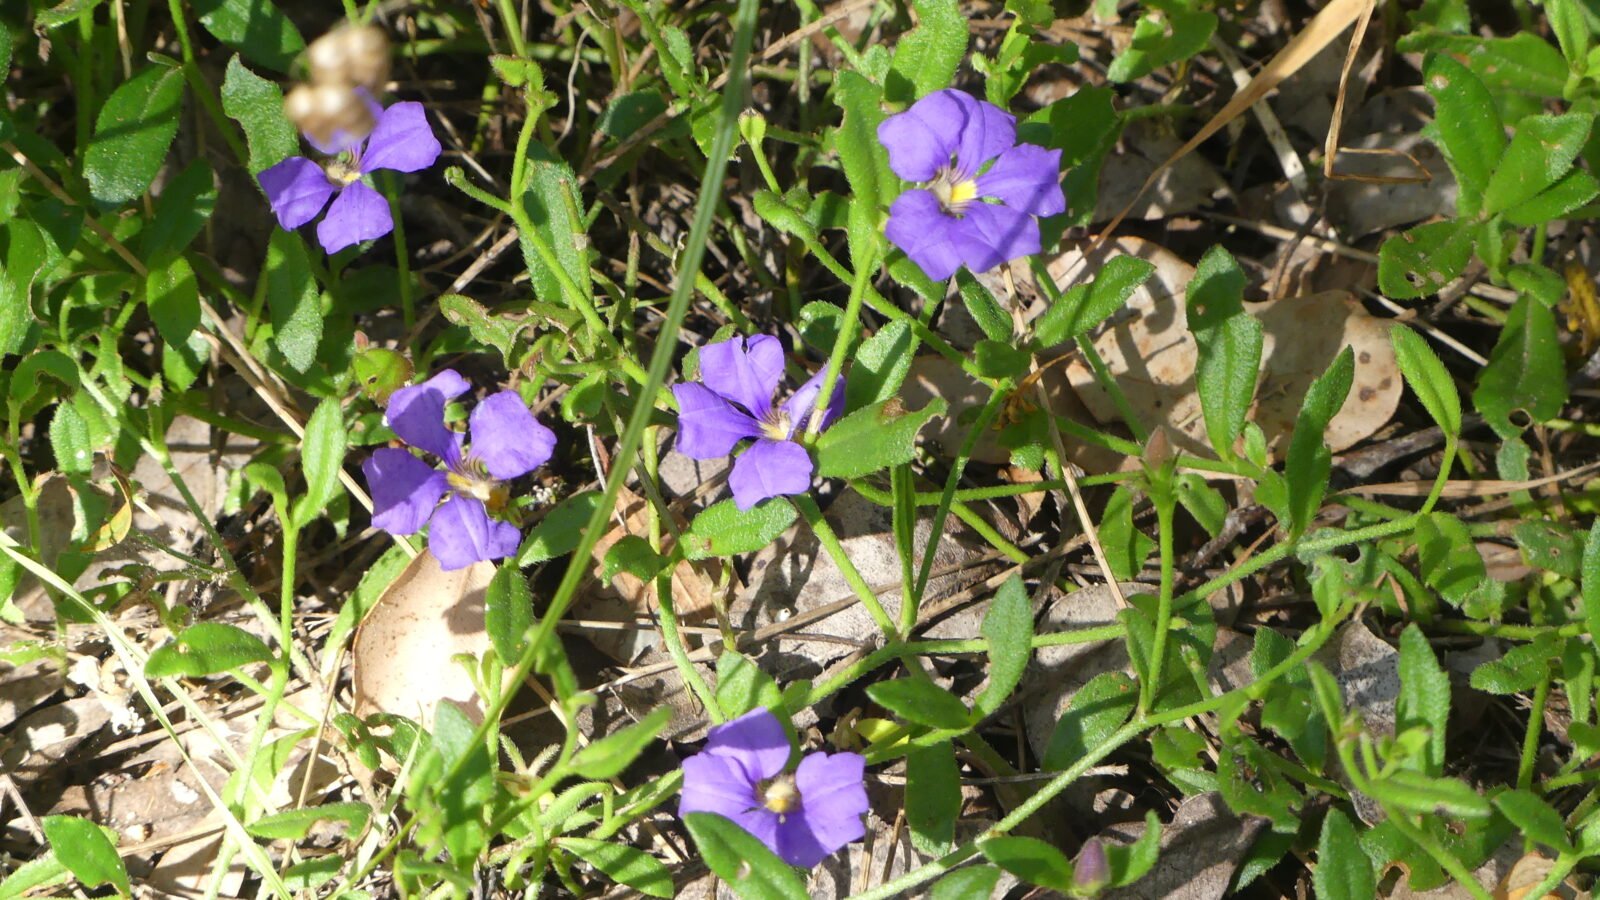
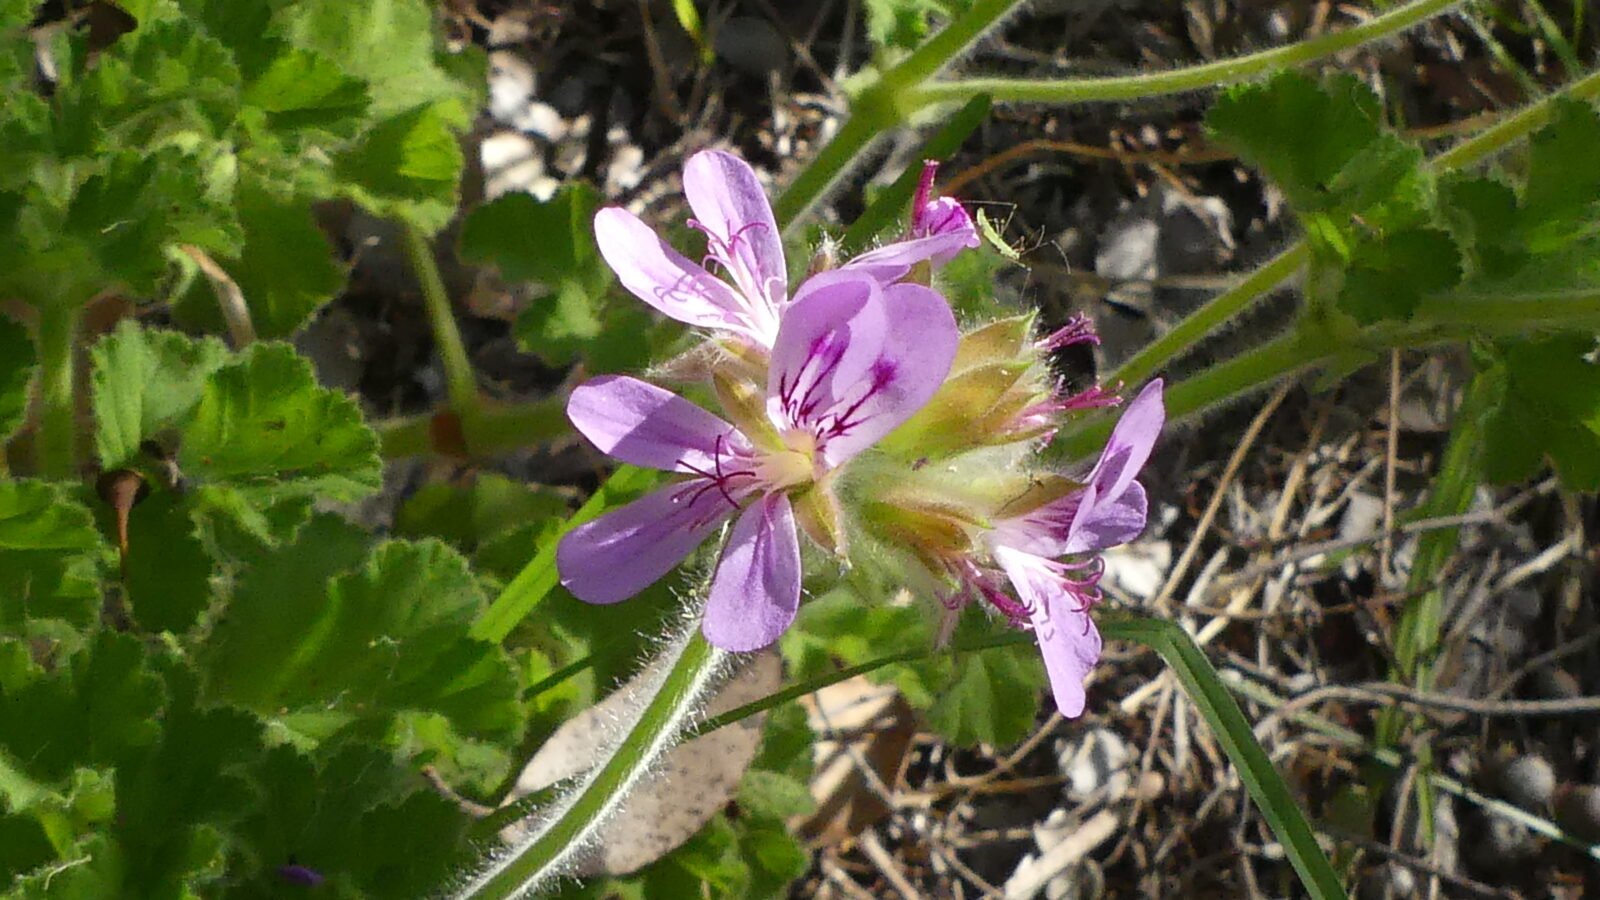
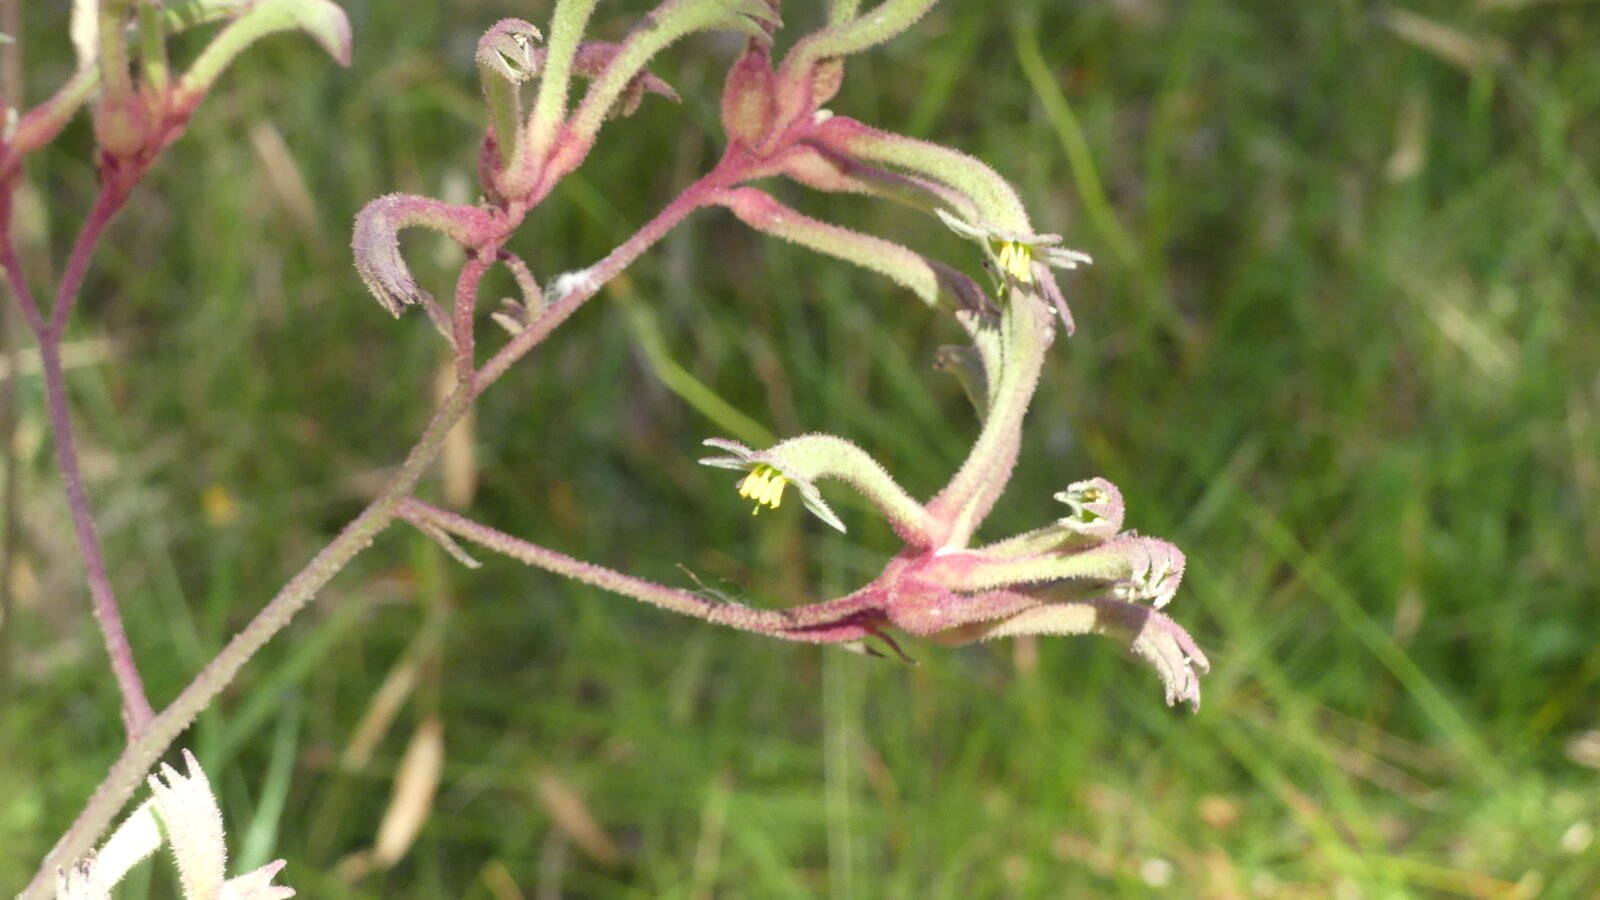
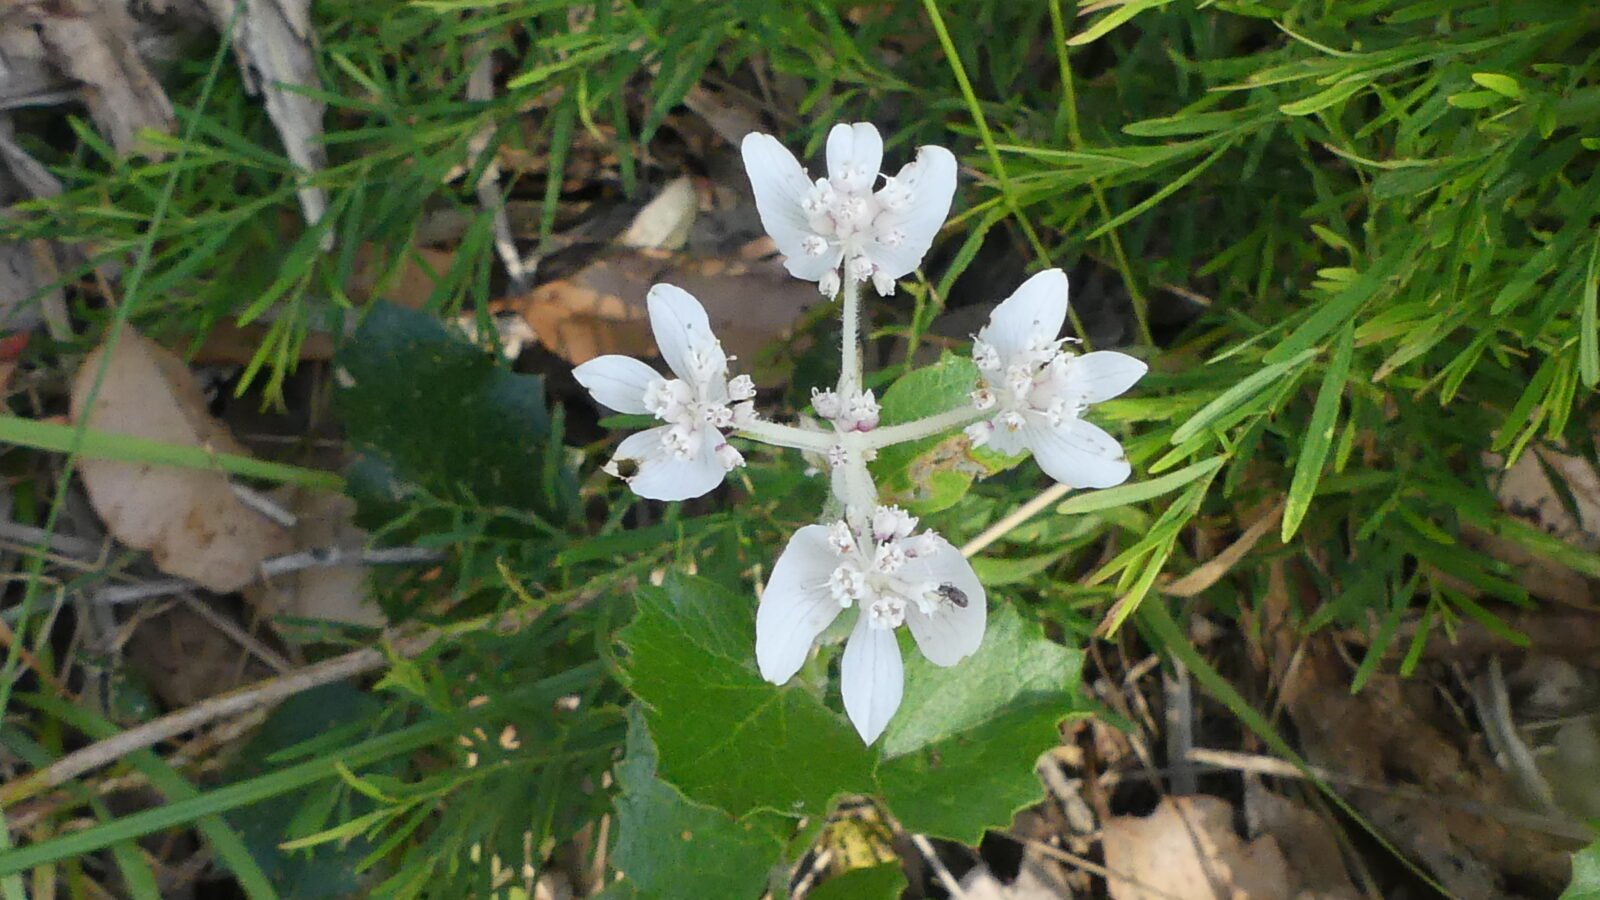
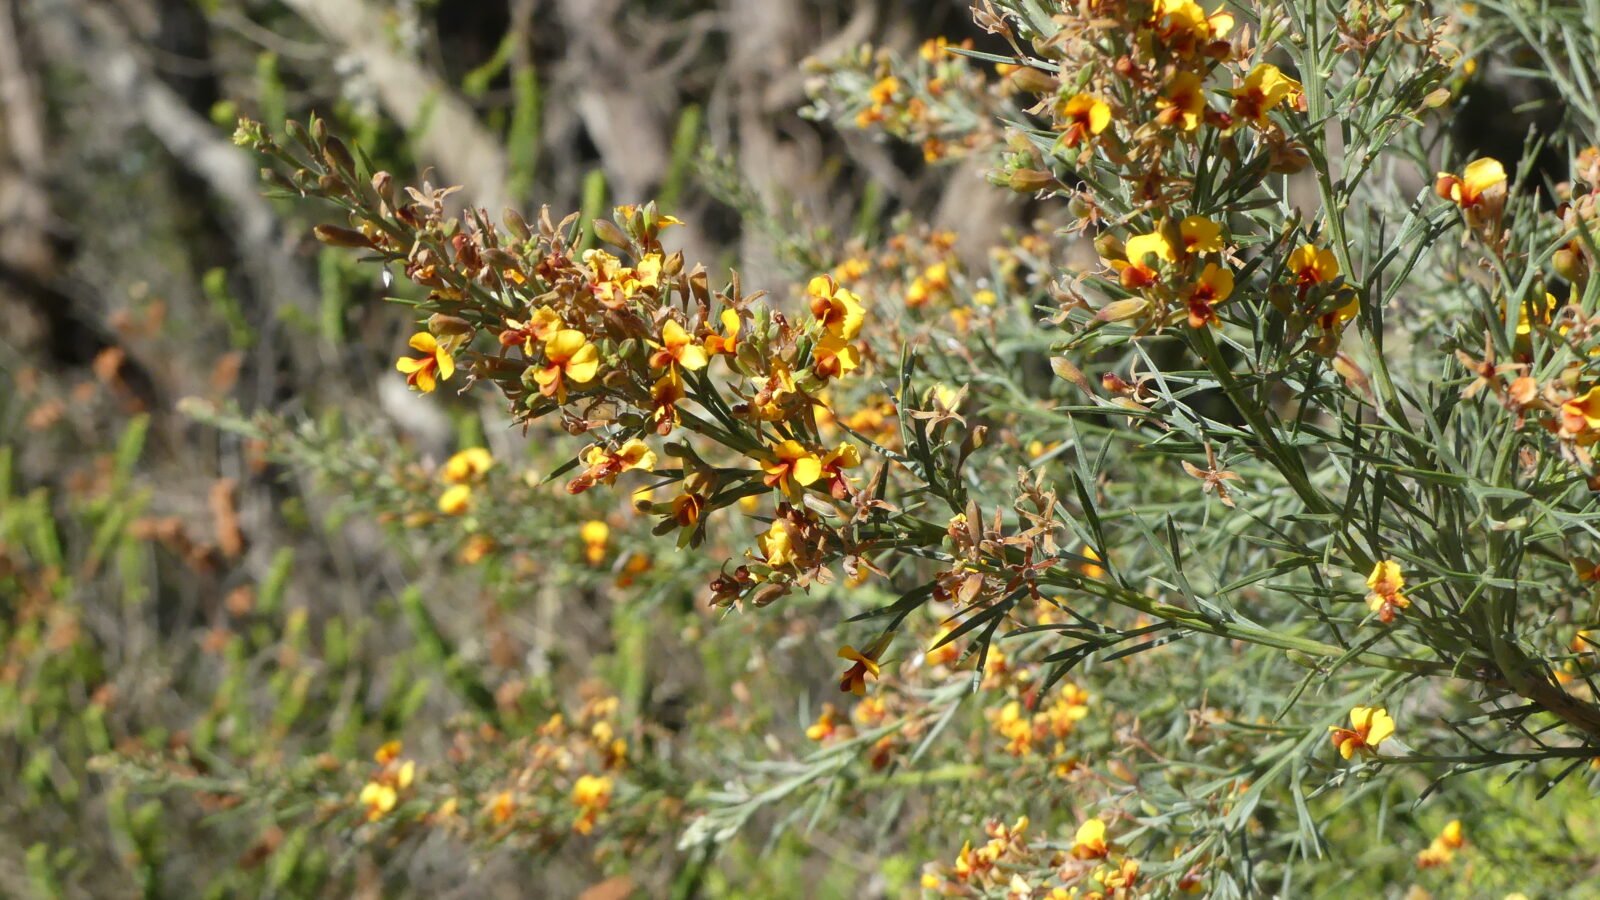
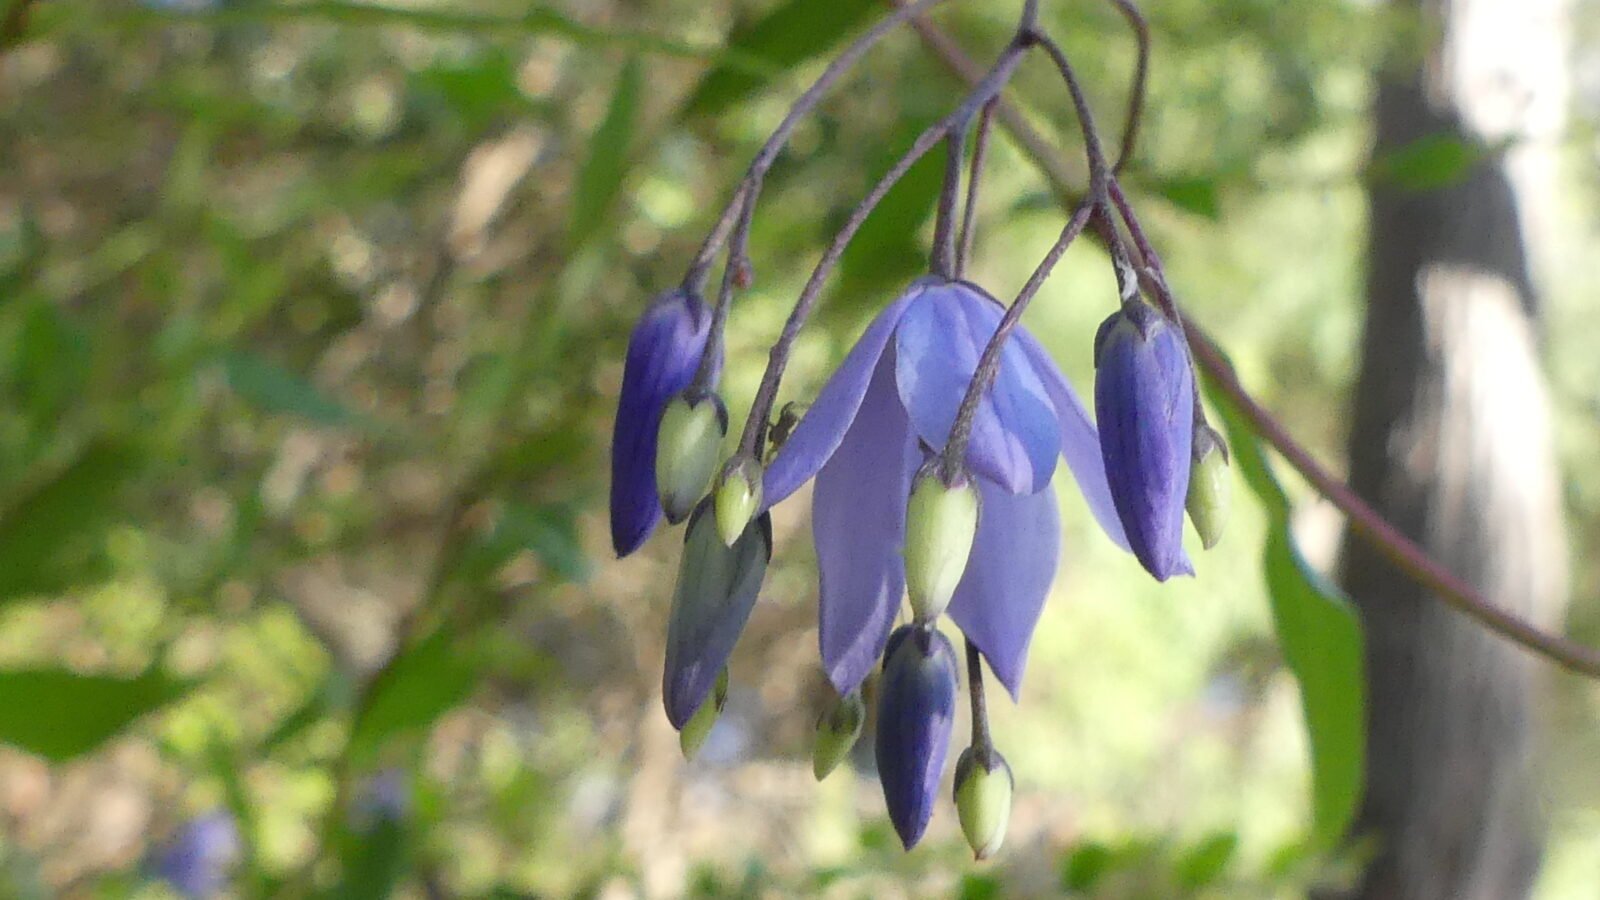
Still lots of things in bloom here including a few we haven’t seen further North.
![](https://alloveraustralia.com/wp-content/uploads/2023/11/Mount-Melville-North-Walk-615x900.jpg)
![](https://alloveraustralia.com/wp-content/uploads/2023/11/Mount-Melville-North-Walk-002-P1100721-1600x900.jpg)
![](https://alloveraustralia.com/wp-content/uploads/2023/11/Mount-Melville-North-Walk-006-P1100725-1600x900.jpg)
![](https://alloveraustralia.com/wp-content/uploads/2023/11/Mount-Melville-North-Walk-009-P1100728-1600x900.jpg)
![](https://alloveraustralia.com/wp-content/uploads/2023/11/Mount-Melville-North-Walk-011-P1100730-1600x900.jpg)
![](https://alloveraustralia.com/wp-content/uploads/2023/11/Mount-Melville-North-Walk-012-P1100731-1600x900.jpg)
![](https://alloveraustralia.com/wp-content/uploads/2023/11/Mount-Melville-North-Walk-014-P1100733-1600x900.jpg)
![](https://alloveraustralia.com/wp-content/uploads/2023/11/Mount-Melville-North-Walk-016-P1100735-1600x900.jpg)
![](https://alloveraustralia.com/wp-content/uploads/2023/11/Mount-Melville-North-Walk-021-P1100740-1600x900.jpg)
![](https://alloveraustralia.com/wp-content/uploads/2023/11/Mount-Melville-North-Walk-026-P1100745-1600x900.jpg)
![](https://alloveraustralia.com/wp-content/uploads/2023/11/Mount-Melville-North-Walk-028-P1100748-1600x900.jpg)
![](https://alloveraustralia.com/wp-content/uploads/2023/11/Mount-Melville-North-Walk-030-P1100751-1600x900.jpg)
![](https://alloveraustralia.com/wp-content/uploads/2023/11/Mount-Melville-North-Walk-031-P1100752-1600x900.jpg)
![](https://alloveraustralia.com/wp-content/uploads/2023/11/Mount-Melville-North-Walk-032-P1100753-1600x900.jpg)
![](https://alloveraustralia.com/wp-content/uploads/2023/11/Mount-Melville-North-Walk-033-P1100754-1600x900.jpg)
![](https://alloveraustralia.com/wp-content/uploads/2023/11/Mount-Melville-North-Walk-035-P1100757-1600x900.jpg)
![](https://alloveraustralia.com/wp-content/uploads/2023/11/Mount-Melville-North-Walk-037-P1100759-1600x900.jpg)
![](https://alloveraustralia.com/wp-content/uploads/2023/11/Mount-Melville-North-Walk-039-P1100761-1600x900.jpg)
![](https://alloveraustralia.com/wp-content/uploads/2023/11/Mount-Melville-North-Walk-042-P1100764-1600x900.jpg)
![](https://alloveraustralia.com/wp-content/uploads/2023/11/Mount-Melville-North-Walk-044-P1100766-1600x900.jpg)
![](https://alloveraustralia.com/wp-content/uploads/2023/11/Mount-Melville-North-Walk-047-P1100769-1600x900.jpg)
![](https://alloveraustralia.com/wp-content/uploads/2023/11/Mount-Melville-North-Walk-050-P1100772-1600x900.jpg)
![](https://alloveraustralia.com/wp-content/uploads/2023/11/Mount-Melville-North-Walk-052-P1100774-1600x900.jpg)
![](https://alloveraustralia.com/wp-content/uploads/2023/11/Mount-Melville-North-Walk-056-P1100778-1600x900.jpg)
![](https://alloveraustralia.com/wp-content/uploads/2023/11/Mount-Melville-North-Walk-057-P1100779-1600x900.jpg)
![](https://alloveraustralia.com/wp-content/uploads/2023/11/Mount-Melville-North-Walk-062-P1100784-1600x900.jpg)
![](https://alloveraustralia.com/wp-content/uploads/2023/11/Mount-Melville-North-Walk-063-P1100785-1600x900.jpg)
![](https://alloveraustralia.com/wp-content/uploads/2023/11/Mount-Melville-North-Walk-065-P1100787-1600x900.jpg)
![](https://alloveraustralia.com/wp-content/uploads/2023/11/Mount-Melville-North-Walk-069-P1100794-1600x900.jpg)
![](https://alloveraustralia.com/wp-content/uploads/2023/11/Mount-Melville-North-Walk-070-P1100795-1600x900.jpg)
![](https://alloveraustralia.com/wp-content/uploads/2023/11/Mount-Melville-North-Walk-073-P1100798-1600x900.jpg)
![](https://alloveraustralia.com/wp-content/uploads/2023/11/Mount-Melville-North-Walk-075-P1100801-1600x900.jpg)
![](https://alloveraustralia.com/wp-content/uploads/2023/11/Mount-Melville-North-Walk-077-P1100803-1600x900.jpg)
![](https://alloveraustralia.com/wp-content/uploads/2023/11/Mount-Melville-North-Walk-084-P1100810-1600x900.jpg)
![](https://alloveraustralia.com/wp-content/uploads/2023/11/Mount-Melville-North-Walk-086-P1100812-1600x900.jpg)
![](https://alloveraustralia.com/wp-content/uploads/2023/11/Mount-Melville-North-Walk-090-P1100818-1600x900.jpg)
![](https://alloveraustralia.com/wp-content/uploads/2023/11/Mount-Melville-North-Walk-092-P1100820-1600x900.jpg)
![](https://alloveraustralia.com/wp-content/uploads/2023/11/Mount-Melville-North-Walk-094-P1100822-1600x900.jpg)
![](https://alloveraustralia.com/wp-content/uploads/2023/11/Mount-Melville-North-Walk-100-P1100833-1600x900.jpg)
![](https://alloveraustralia.com/wp-content/uploads/2023/11/Mount-Melville-North-Walk-102-P1100835-1600x900.jpg)
![](https://alloveraustralia.com/wp-content/uploads/2023/11/Mount-Melville-North-Walk-107-P1100840-1600x900.jpg)
![](https://alloveraustralia.com/wp-content/uploads/2023/11/Mount-Melville-North-Walk-109-P1100843-1600x900.jpg)
![](https://alloveraustralia.com/wp-content/uploads/2023/11/Mount-Melville-North-Walk-111-P1100845-1600x900.jpg)
![](https://alloveraustralia.com/wp-content/uploads/2023/11/Mount-Melville-North-Walk-113-P1100847-1600x900.jpg)
![](https://alloveraustralia.com/wp-content/uploads/2023/11/Mount-Melville-North-Walk-114-P1100848-1600x900.jpg)