Setting Up:
Please bear with me if some of this sounds too simplified but for some of you it will be helpful, there is no shame in learning something!
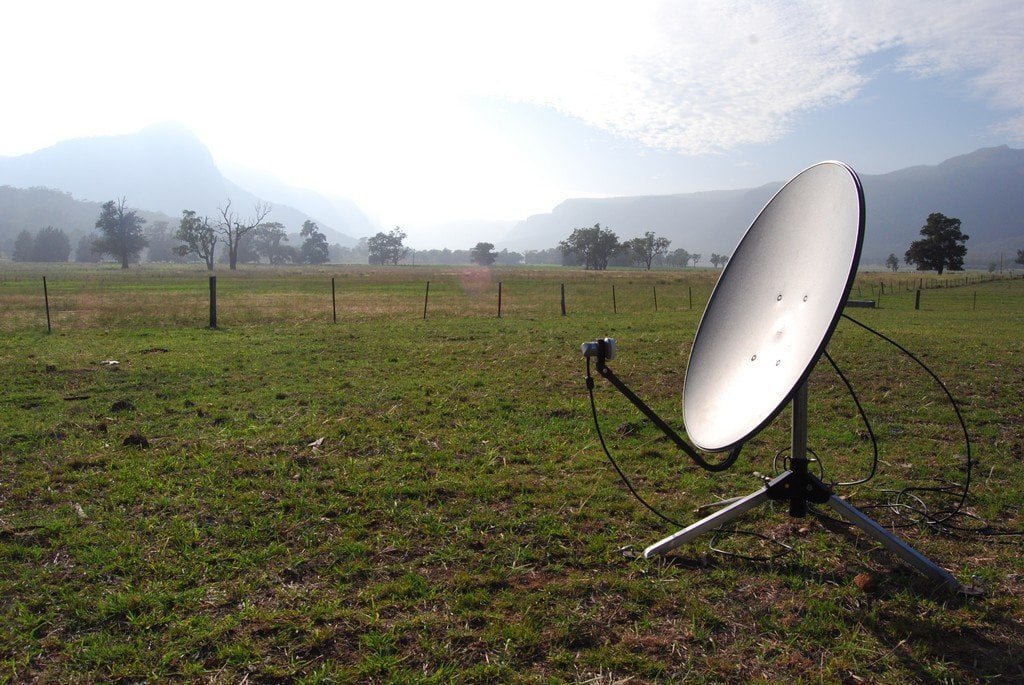
“It works anywhere..” Often said by users in response to questions on Facebook; not quite true I am afraid and obviously said by those who have not been in a situation where it doesn’t. This is really only due to being unable to get a signal over, through or past an obstruction (or some form of high level interference). If you are in dense forest there may be no clear path through the trees at the angle of elevation you need or in steep gorge type country the surrounding terrain is just too high and close. Things that affect the levels you get include Signals from the satellite being absorbed (by vegetation), distorted and/or reflected (by water and metal); the very geology of the ground can come in to play as well, eg in high Iron Ore territory (interference). We will look at how some of the Apps can help determine and demonstrate this. Obviously much of this applies more as you get further South or West where a lower angle of elevation is needed.
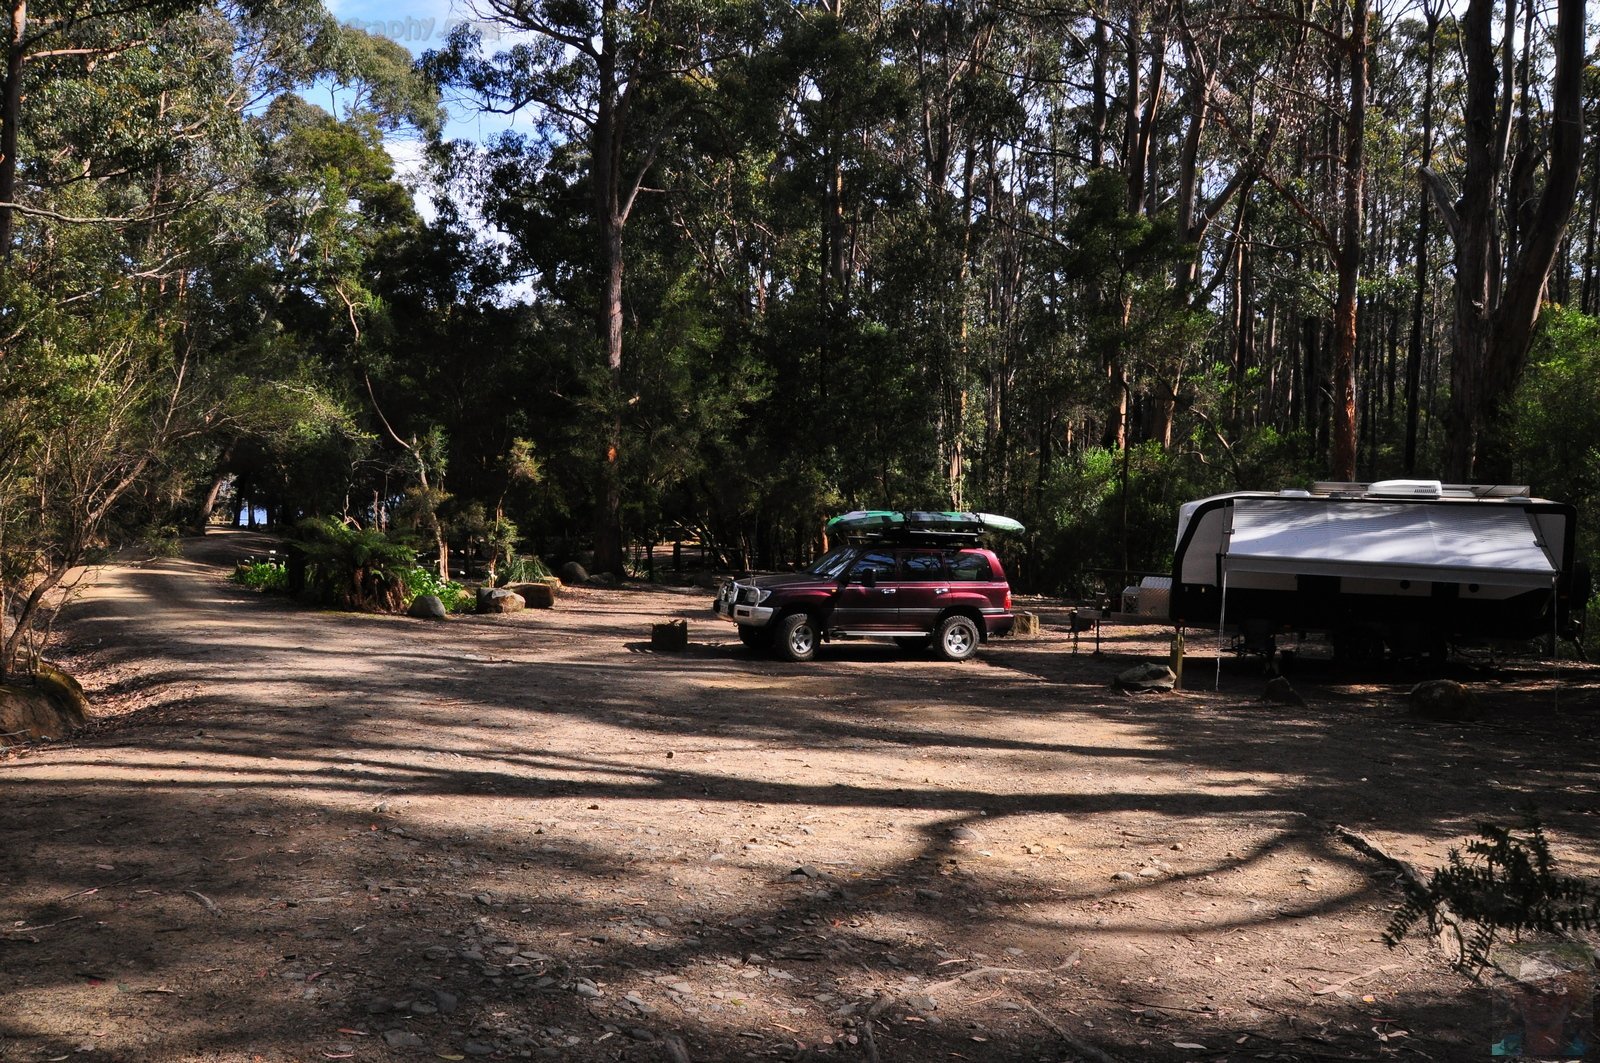
The image here is in South Eastern Tasmania (Fortescue Bay) and the sight line to the Satellite is through the middle of the trees (and of course from next to the van, not back here up the slope either!) and so totally unable to get a dish alignment in this location.
How the Dish Receives the Signal
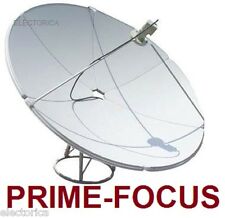
This diagram shows a typical dish with an “offset” of 22 degrees; this means that the dish is pointed at an angle 22 degrees lower than if the signal was aimed directly at the dish centre which is the case with what is called a “Prime Focus” (axi-symmetric) dish, also pictured. The dish works by being what is called “parabolic” in shape which means that every tiny point on the dish reflects the signal onto the LNB and when perfectly aligned the LNB is receiving the maximum possible signal, this accuracy is what makes dish alignment so critical within fragments of a degree.
A Prime Focus Dish is not used for VAST because the dishes are small and the LNB in the centre creates too much of it’s own shadow.

Aligning the dish
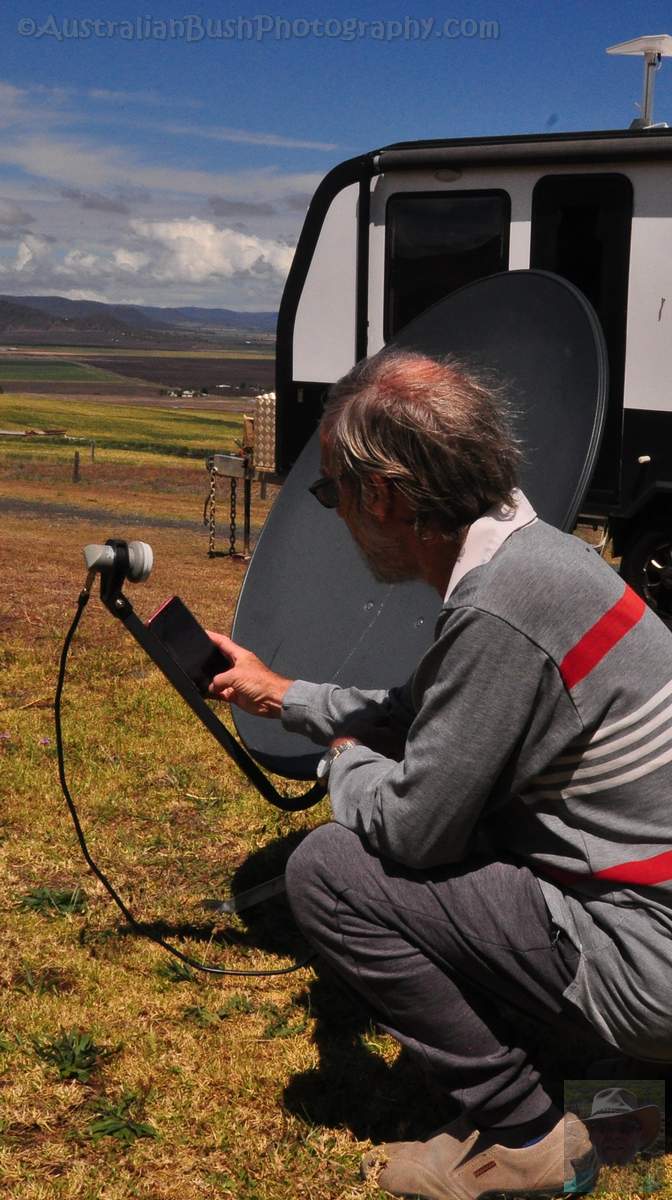
The first thing to check then is the direction of the satellite from your location. I highly recommend you use a smartphone App for this and there are a few available in the App Store, as well as the one included in WIkicamps. I have personally tested 17 satellite finder apps and most of them do not allow for magnetic variation(and/or are simply not accurate) and I can assure you that you will get tired of trying to work it out and correct for it. The one App which does allow for it and gives me a perfect direction alignment is SatFinderAndroid by Paul Lutus. This App incorporates gps location with magnetic or true North selection, selection of satellite (you only need to do this once), a built-in spirit level bubble with calibration, directional arrow finder, and skyview using your phone camera to show exactly where the satellite is in the sky. There is also a comprehensive Help file with all the instructions as part of the App. I have also published a guide to using the App as a separate article.
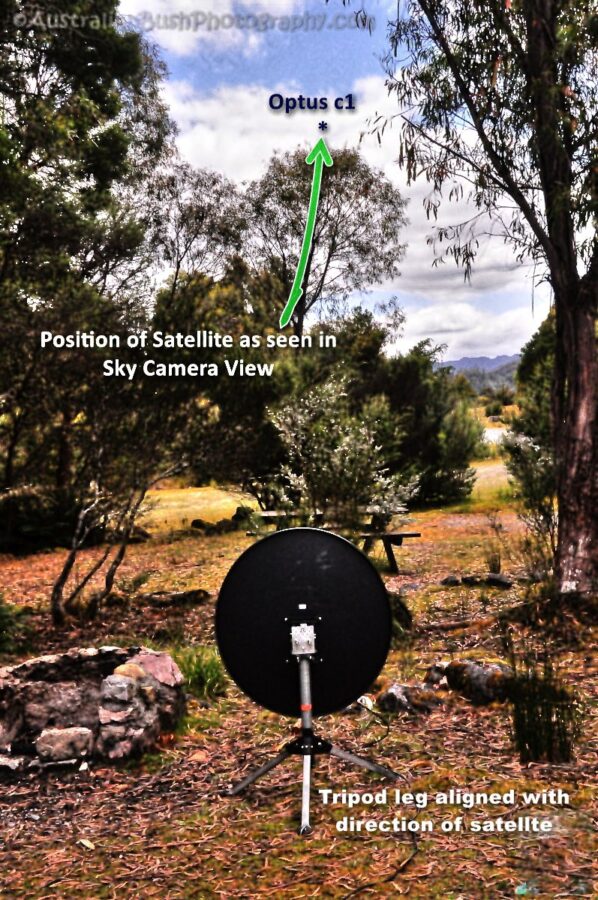
At this point, if there are trees or other structures in the direction of the satellite use the Camera View function in the App to see exactly where the Satellite is in the sky (see image) and then position the tripod accordingly to get a clear “line of sight”.
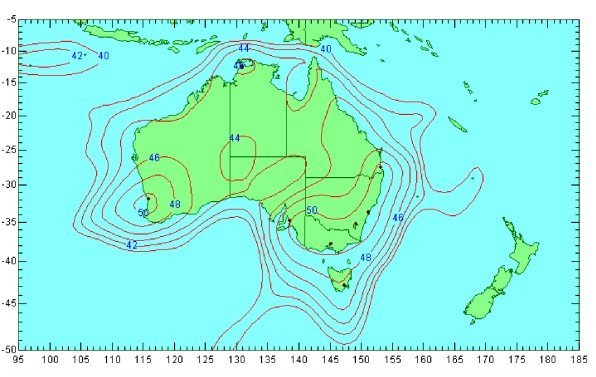
If you do not have a smartphone or tablet you will need a compass but you should be aware of the magnetic variation against true North as shown in the Map image; to go with this method you need to refer to a chart of satellite positions such as this one: http://force-electronics.com.au/wp-content/uploads/2012/07/Vast-Information.pdf
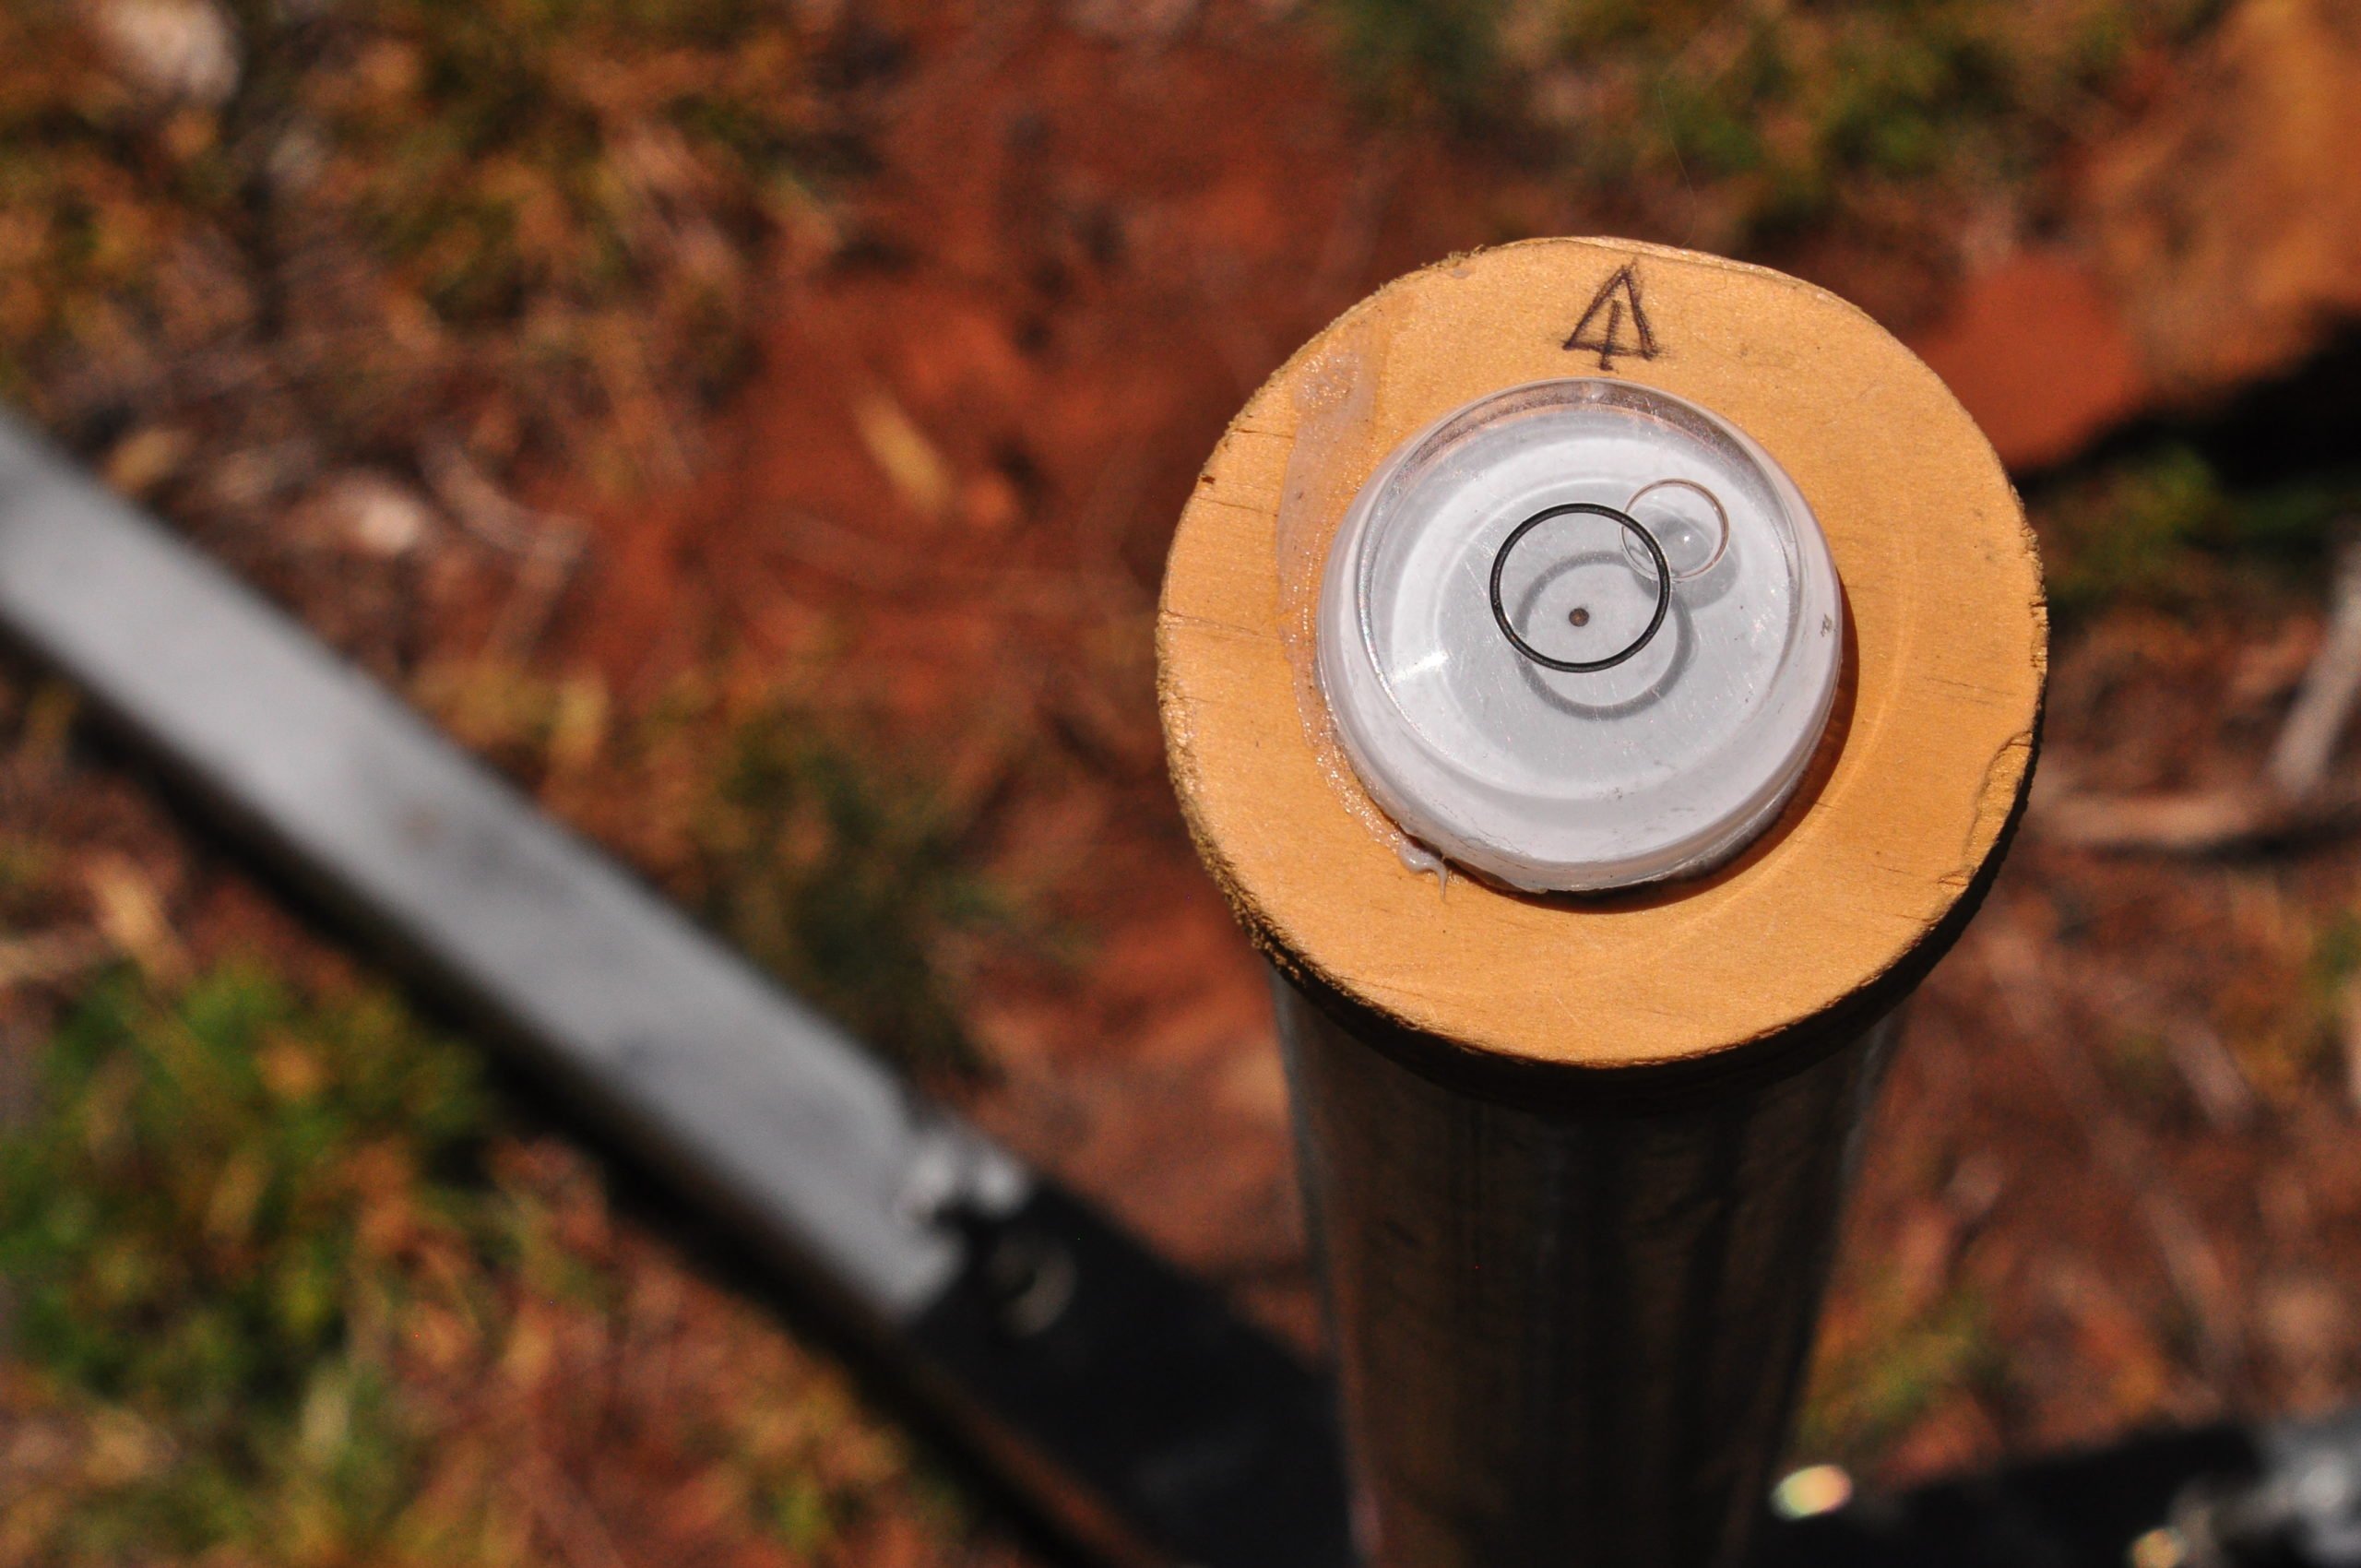
The tripod and setting it up the easiest way: One of the “secrets” to keeping setup time to the minimum is to have a standard way of setting up the tripod and the dish so that you need very little adjustment as you move from one location to the next. Tripod kits usually include a spirit level, usually a bubble type or in some cases built in to the tripod assembly. I have made some small modifications for my own use and this is one of them; here the bubble level is glued to two plywood discs that sit in the top of the tripod temporarily, a small arrow is used to point approx. to the satellite direction (in case my gluing is not quite true!).
When setting up the tripod and dish there are three “dimensions” of dish alignment with the satellite; the Elevation above the horizontal (tilting the dish), the bearing in degrees East of North, also referred to as “Azimuth” (rotating the dish side to side), and the polarisation or “Skew” as it is usually called (rotating the LNB on the end of the arm). How we set up the tripod affects all of these and how easily and quickly we can accomplish it. The first thing we need to know is the compass bearing to the satellite before putting the tripod in place. Some will say it doesn’t matter which way the tripod faces but it is more stable when “balanced” by having the dish in line with one of the three legs as pictured. I usually set up the tripod with a single leg pointing away from the satellite and in line with the compass bearing; this makes it very easy to point the dish accurately when you place it on the tripod. There is also another small advantage in doing this as explained in aligning the dish below.
Whether you choose to do this or not please DO ANCHOR YOUR DISH TO THE GROUND, usually with simple tent pegs, tripods usually have holes for these. On the one occasion when I didn’t peg my dish down at a simple overnight stop we had a sudden gust of wind that blew the dish on its face and broke the plastic LNB bracket – at a replacement cost of $25 plus postage.
Most tripods have some type of levelling screws, one on each leg, and it is always best to start with all of them screwed right back so they are having no effect (A good idea is to do this when dismantling and packing away).
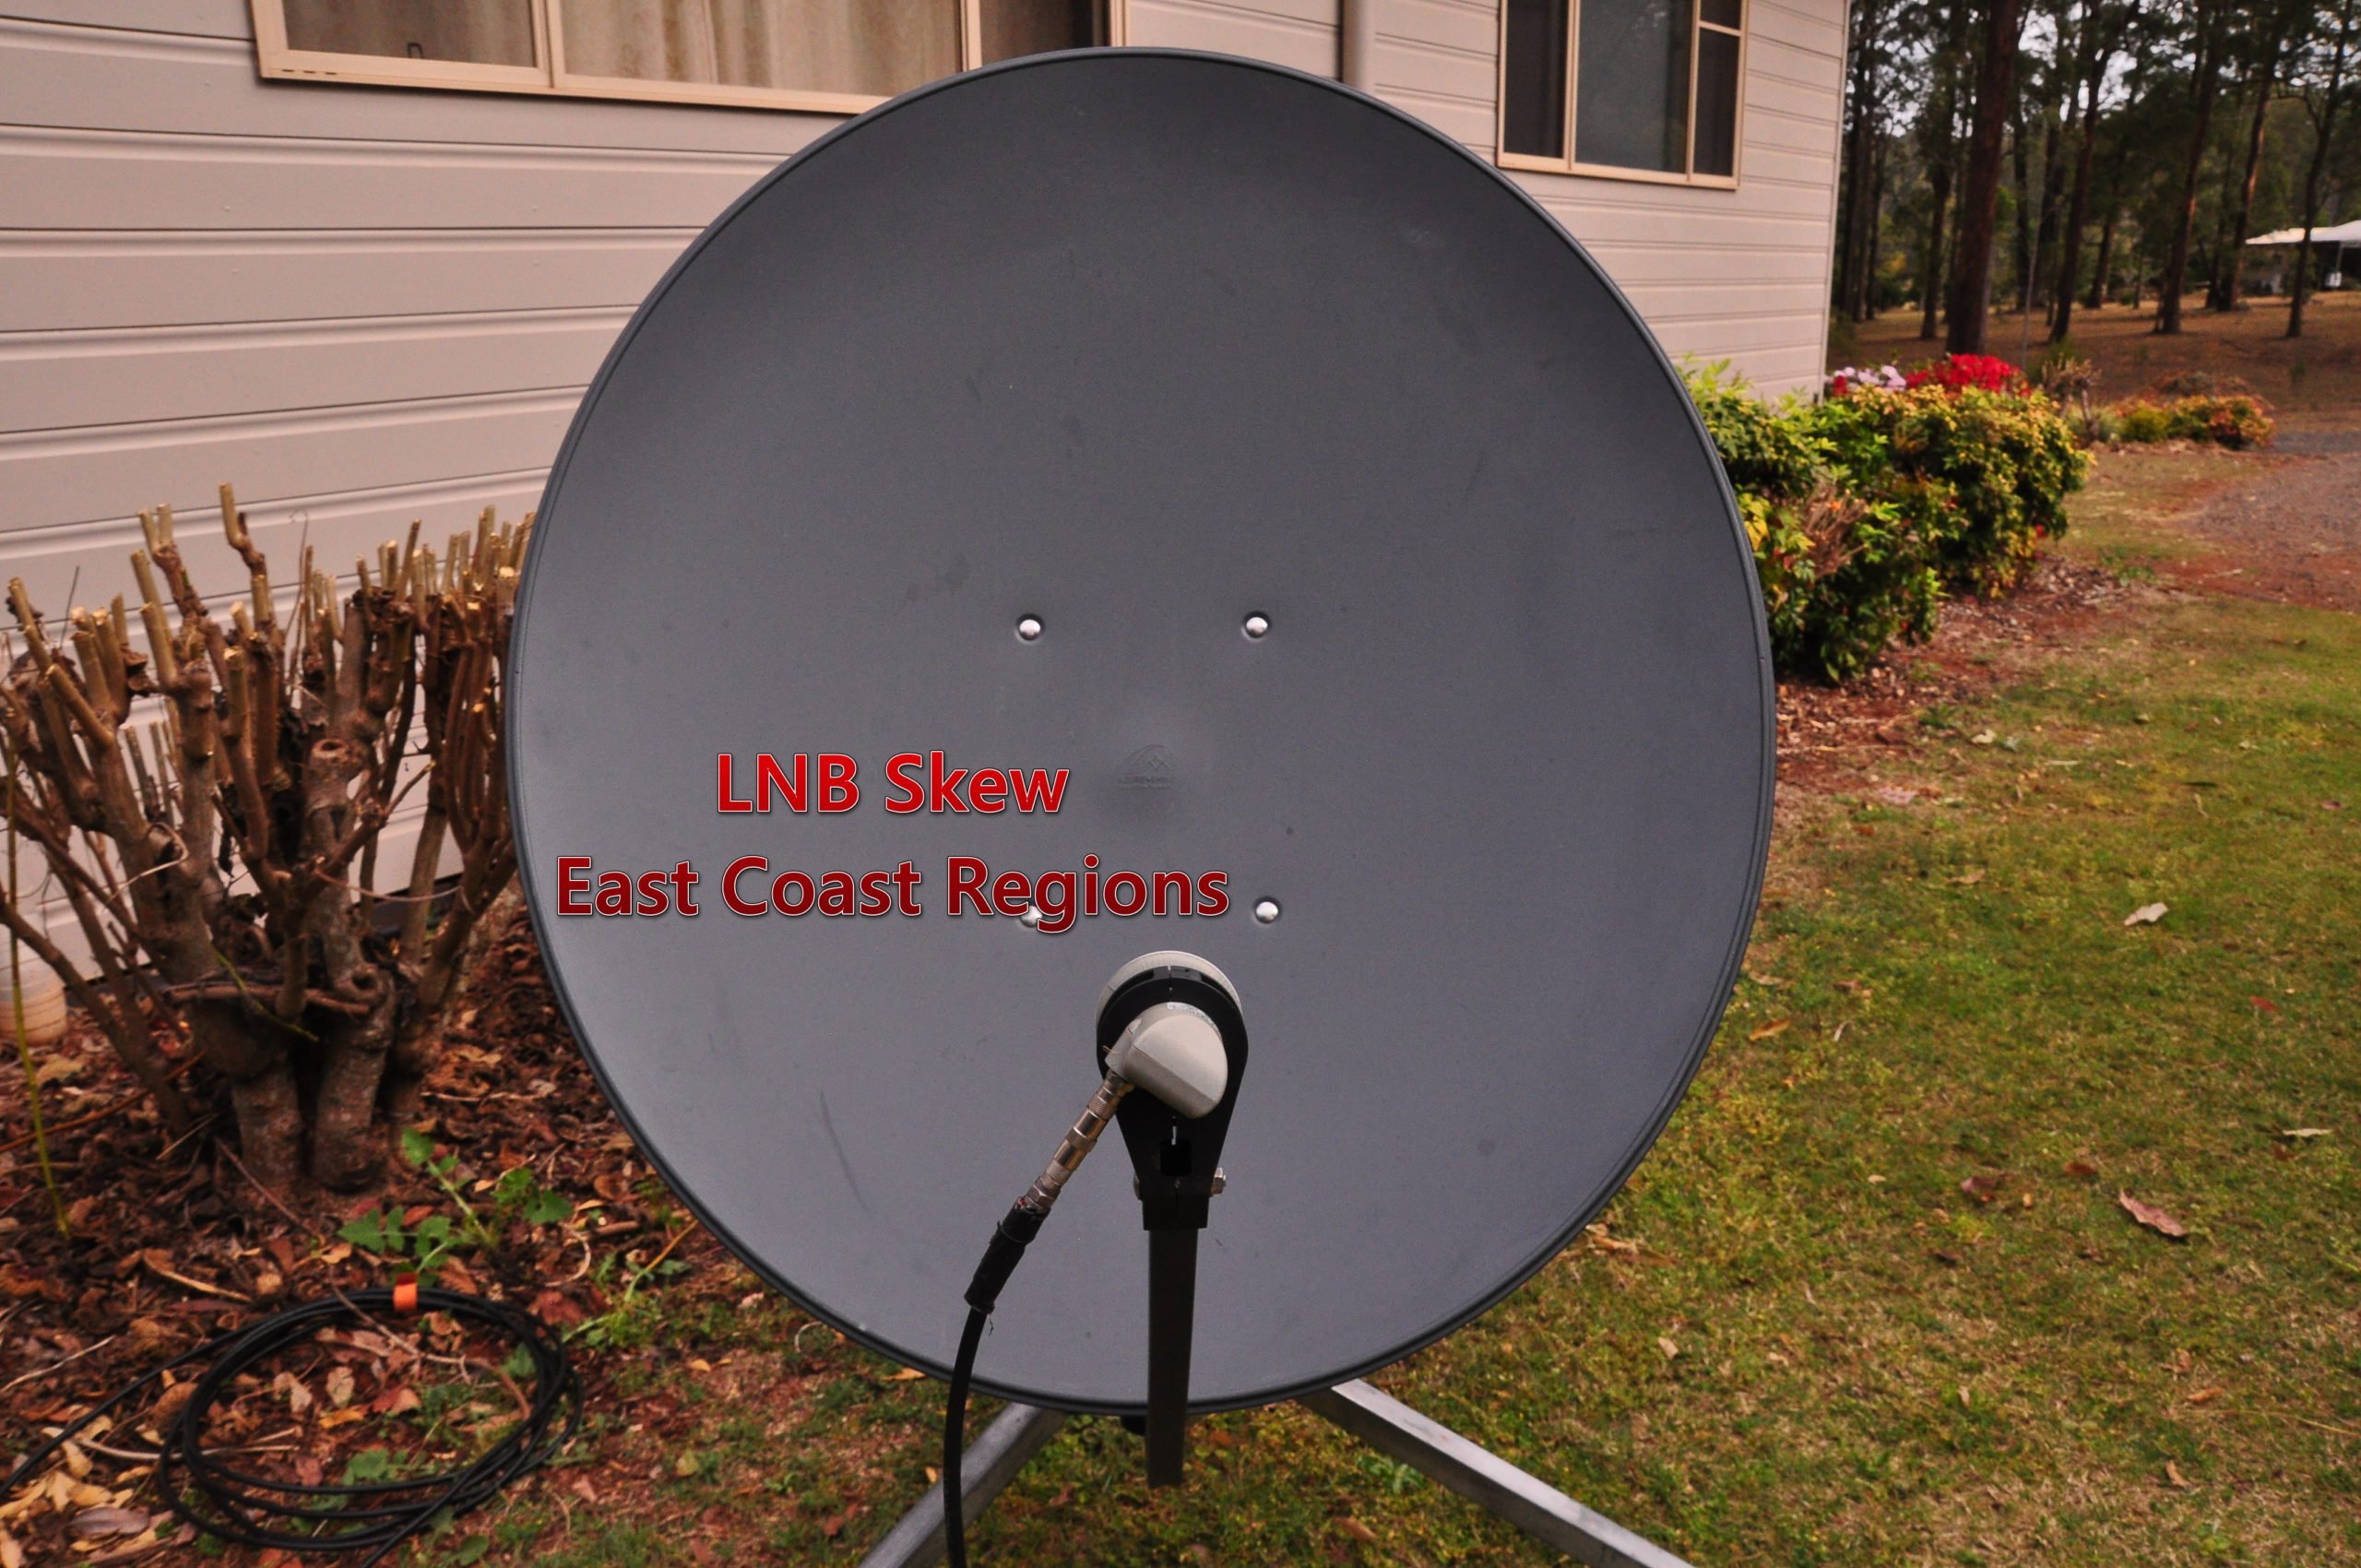
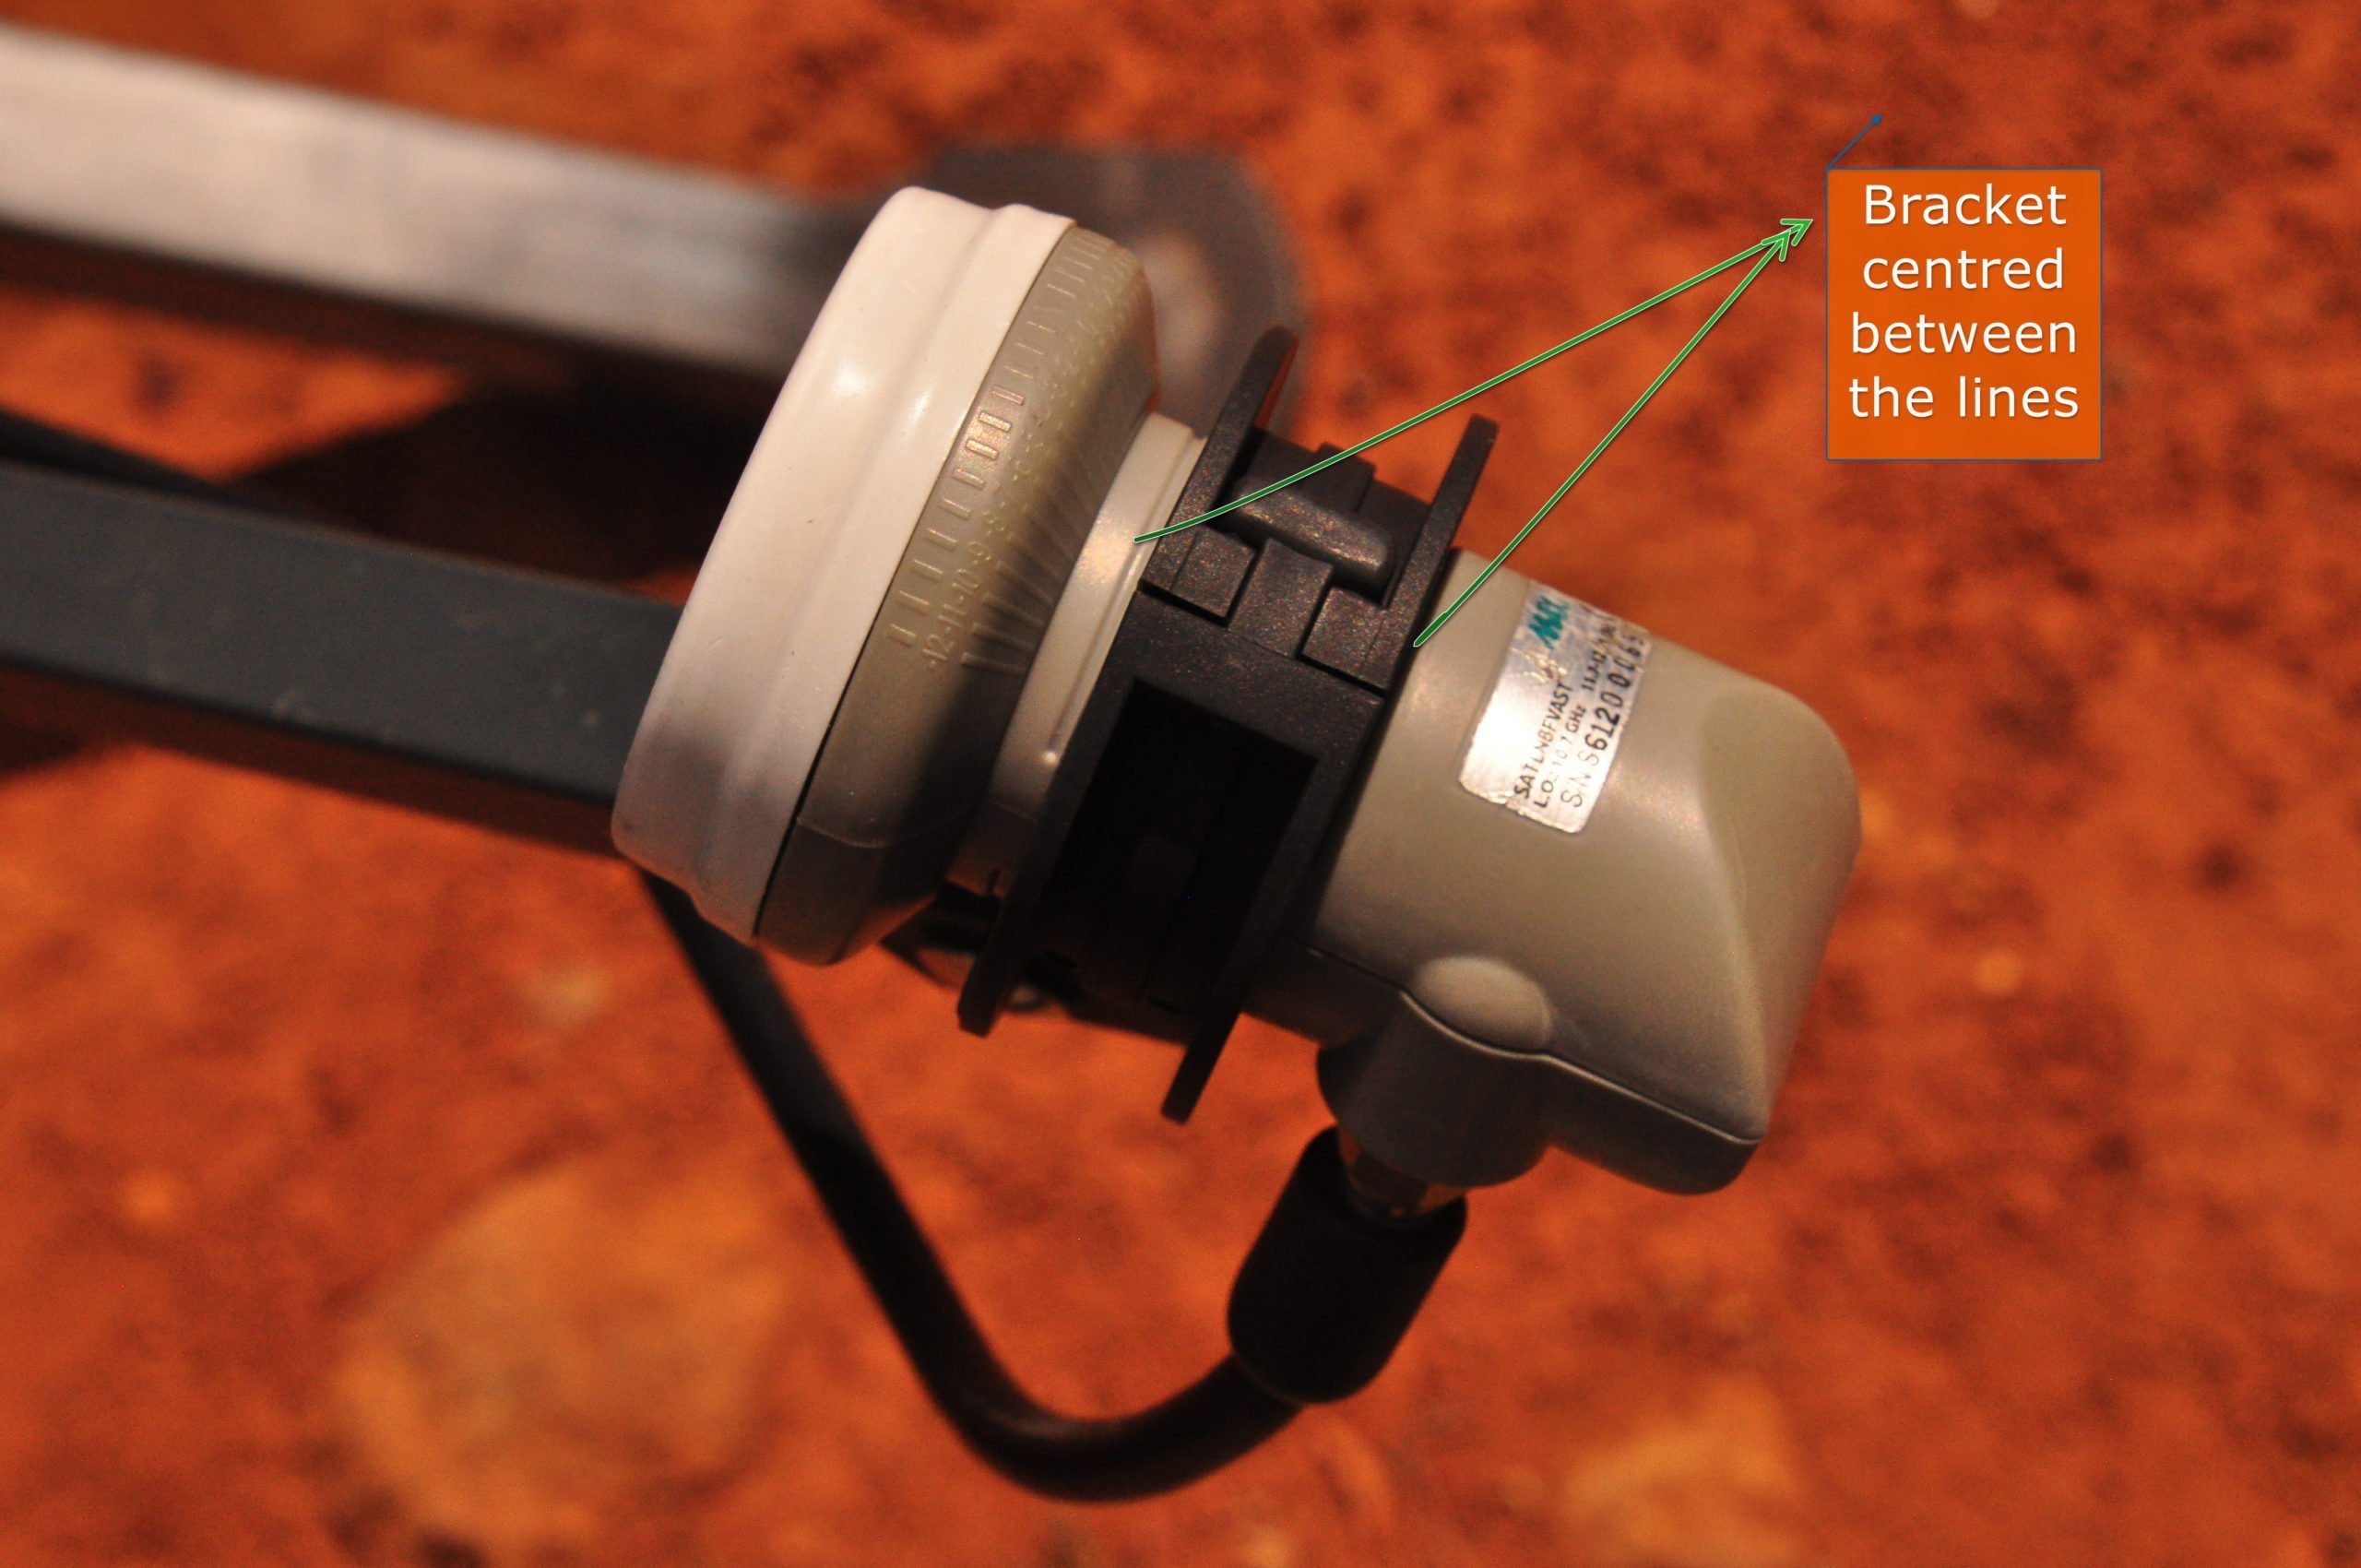
Having got the tripod facing the right way and level fit the dish onto the centre column and tighten the clamps completely leaving the clamping screw at the bottom of the column loose enough to allow it to turn smoothly; slightly loosen the elevation screw clamps to allow adjustment but not loose enough to allow the dish to tilt down under its own weight (see note ref modifications); check the LNB for the angle of Skew. Skew is not as critical as the other adjustments but it does need to be in the right ballpark area. Also check that the LNB is centred between the guidelines, sometimes when packed away this can be bumped out of place. As for the angle of the skew, in South Eastern areas it should be turned clockwise when looking over the LNB to the dish,(see image) refer to the chart below (End of article) for variation of angles which shows that Skew is at Zero along a line from South of Cape York to Perth, below that line is clockwise (positive) and above that line is anti-clockwise (negative).
The Satfinder Android App does provide a reading for Skew but it is not the rotational angle of the LNB which we use here so ignore that reading (it relates to the skewing of the whole dish in permanent installations)
Now connect the signal finder (see full details below) and proceed to adjust.

Modification to elevation adjustment (tilt):
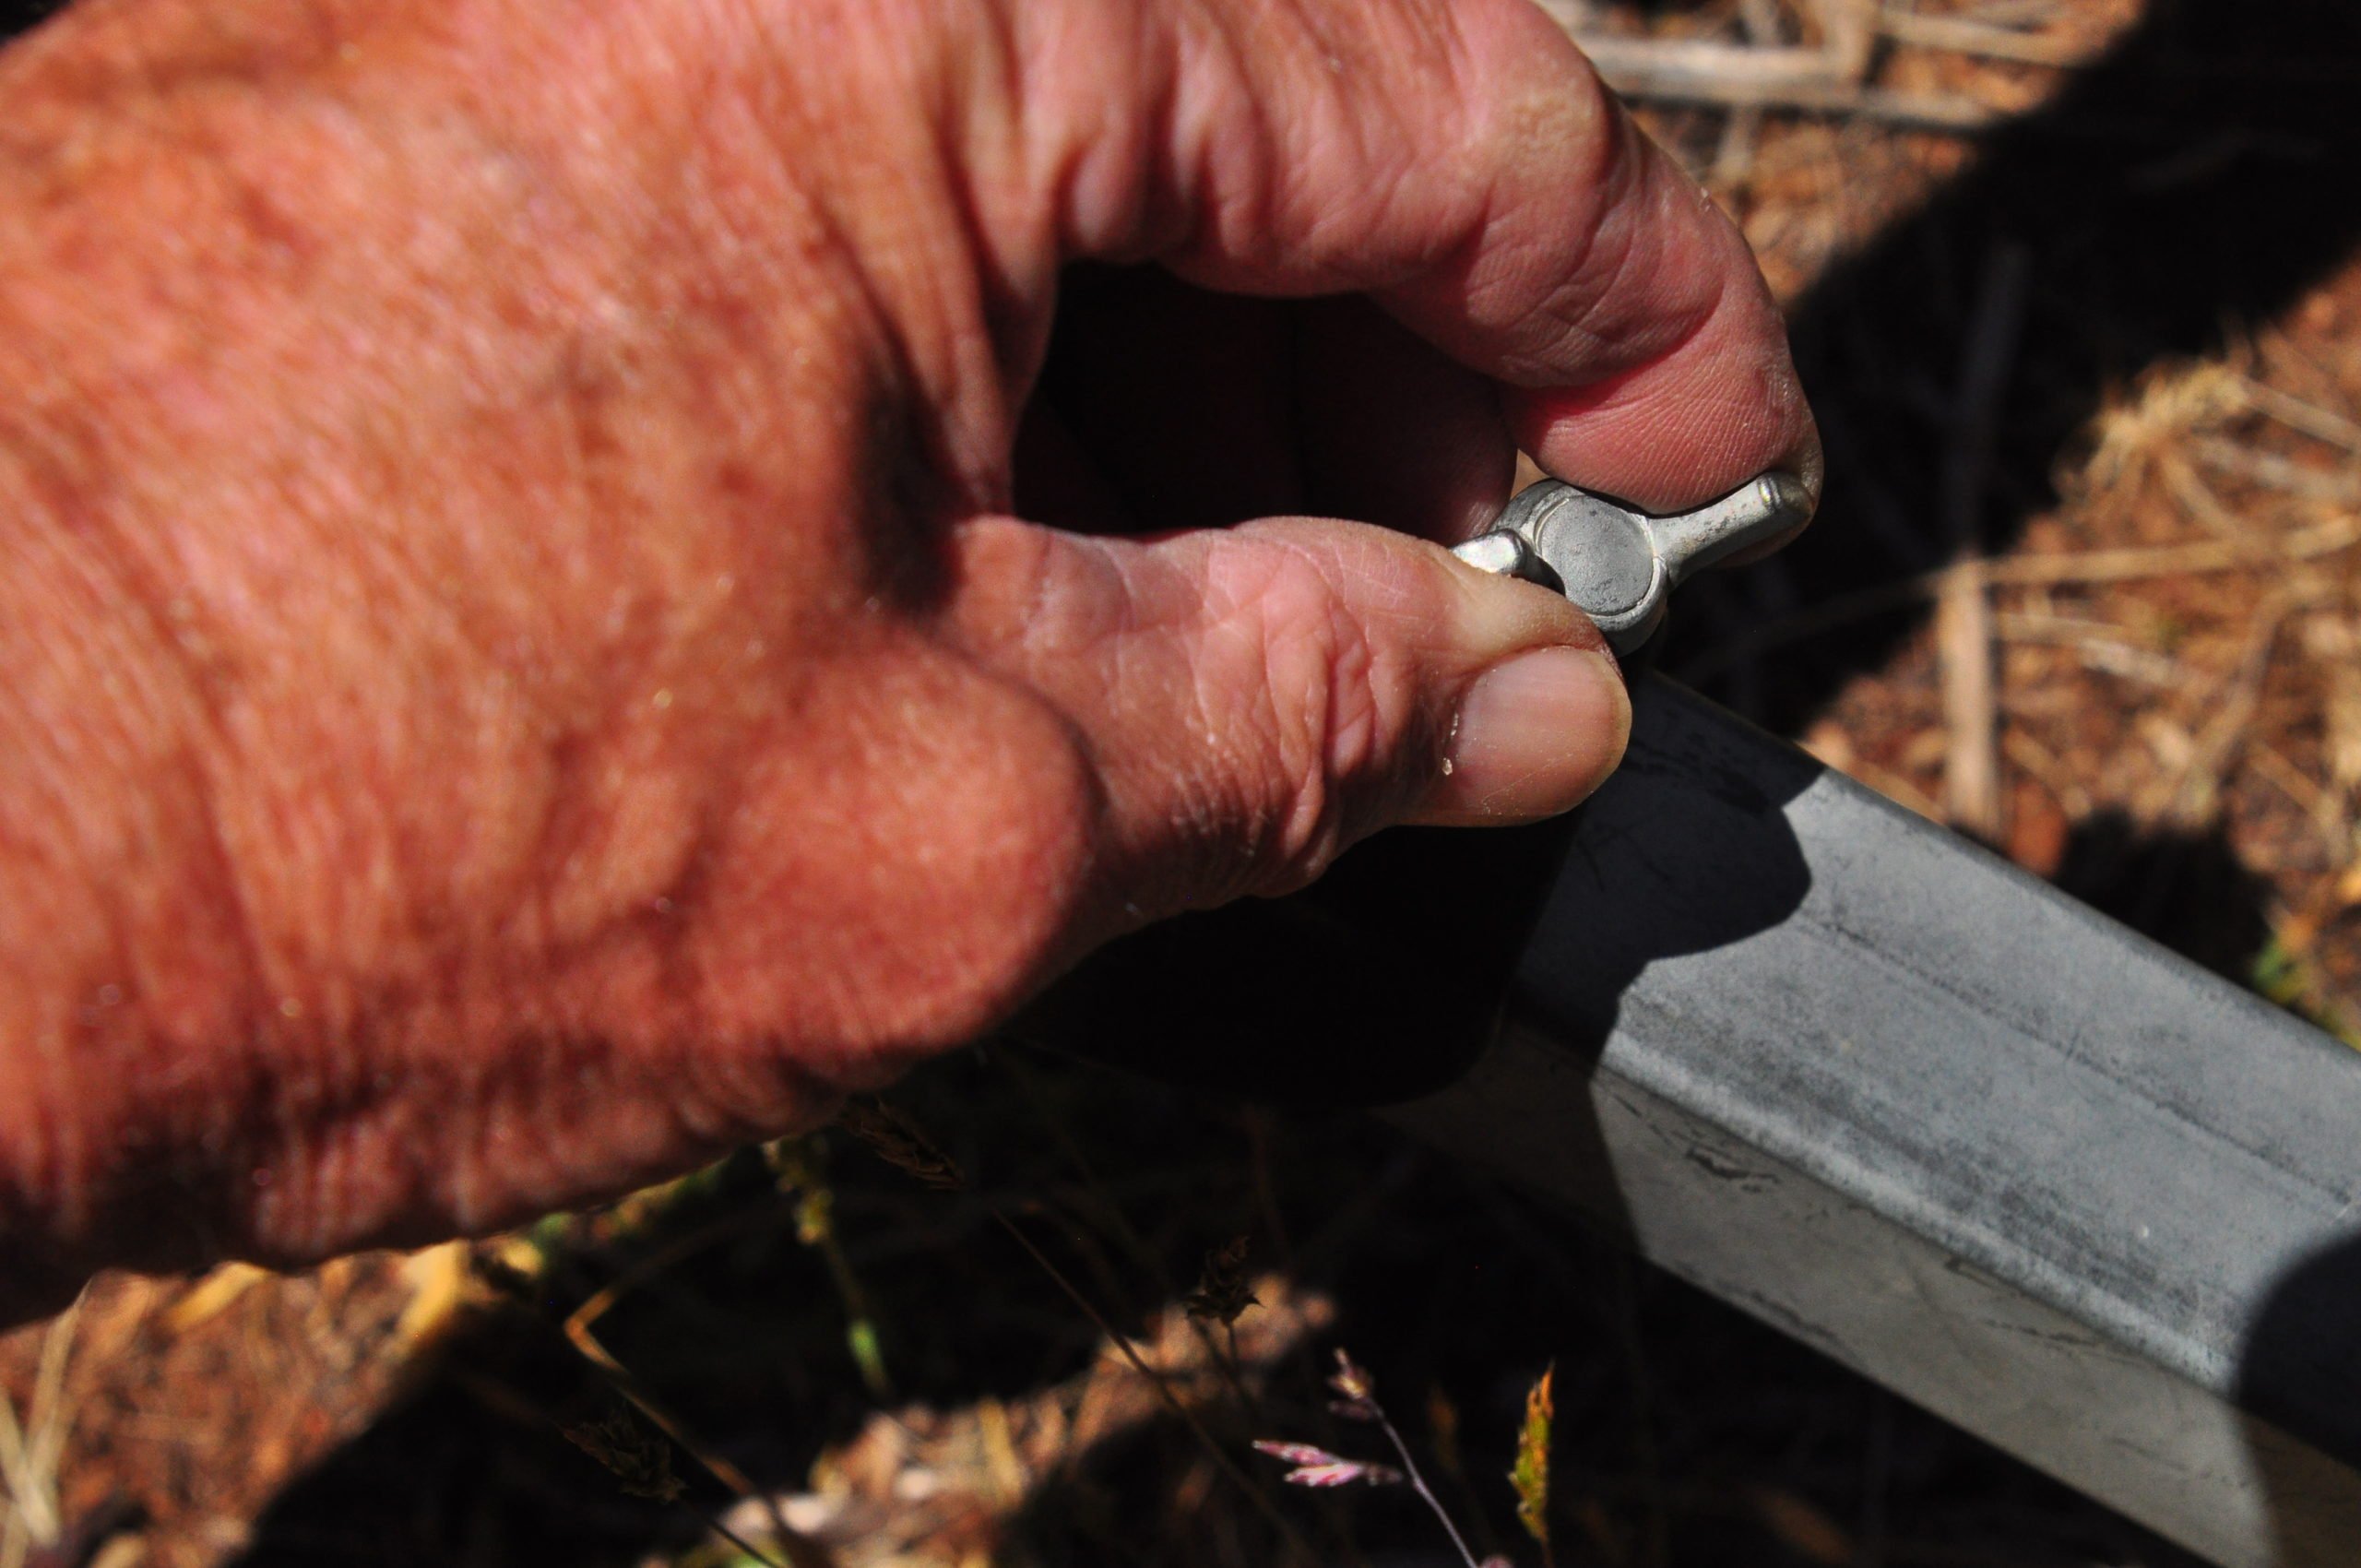
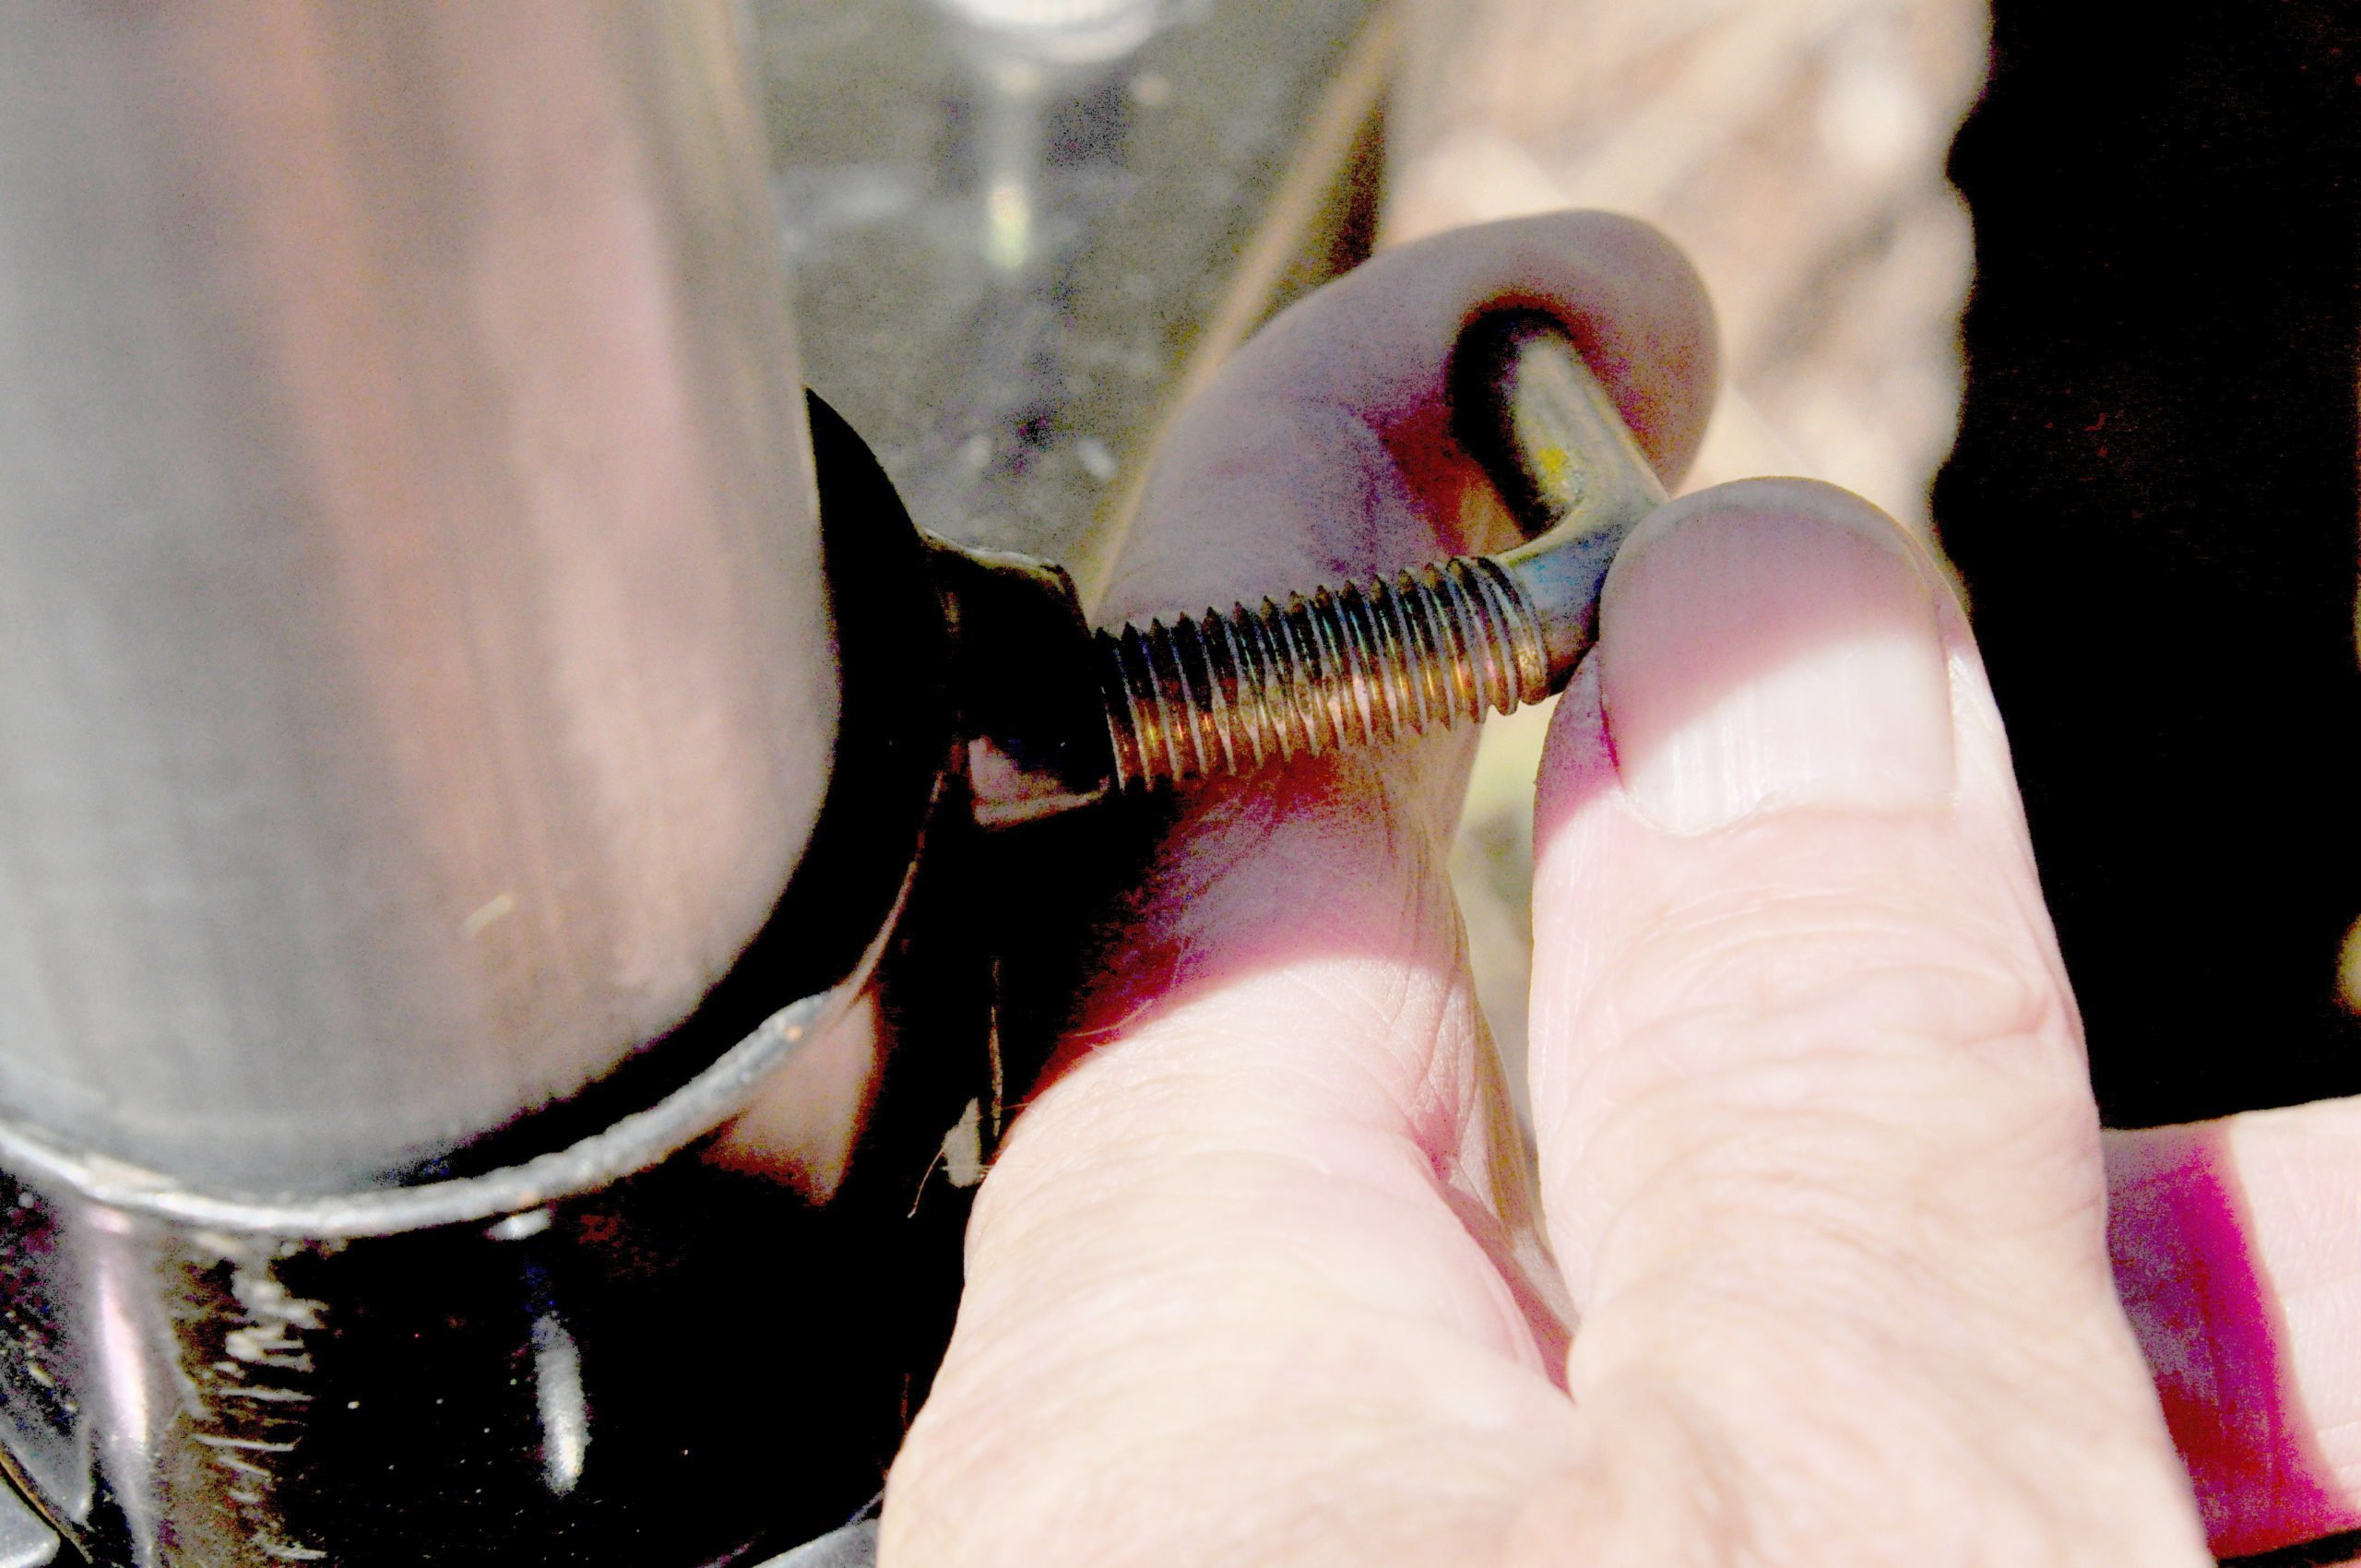
On our own dish I have made a modification to the dish mounting bracket to allow for fine adjustment using a long screw and wing nut; see image; some dishes have this facility built in but not the majority. Without this modification, it is easy to get a fine adjustment of the elevation using the tripod adjusting screws. It is not always easy to adjust the elevation accurately when tilting the dish up or down and then holding it in exactly the right spot while tightening the elevation clamp screws, often it moves slightly and your signal level drops. This is the other reason for aligning the rear tripod leg in line with the satellite and at the rear, the screw for this leg can increase the rear of the dish (lowering the elevation angle), and using the two front ones together can raise the front of the dish, increasing the elevation angle.

Elevation Measurement
Calculating and measuring the elevation for your particular dish and tripod combination:
Because the majority of dishes have an offset of 22 degrees and the LNB arms are not all bent at the same angles, the actual angle of the part you can measure will differ. In the image we see a smartphone with an elevation App (Clinometer) resting on the arm and giving a reading of 37.7 degrees; at the same time the App shows us that our true elevation of the satellite at this location is 57.2 degrees. To the true elevation, we deduct 22 to get our actual elevation of the dish center so in this case that would be 35.2 degrees. We now see that this is 2.5 degrees less than our reading on the phone. This means that we now know that we have to adjust the true elevation by minus 19.5 degrees in order to use an elevation meter of some sort. In practice simply deducting 20 degrees would be enough for a starting point.
Once you have the dish set for a particular location, so long as you follow the process of levelling the tripod and you haven’t travelled more than a couple of hundred kms the dish will be within “tuning range” when next you set it up and you will not need to measure the elevation again, it will only need a small upward (if you have gone North or East) or downward adjustment (if you have gone South or West)

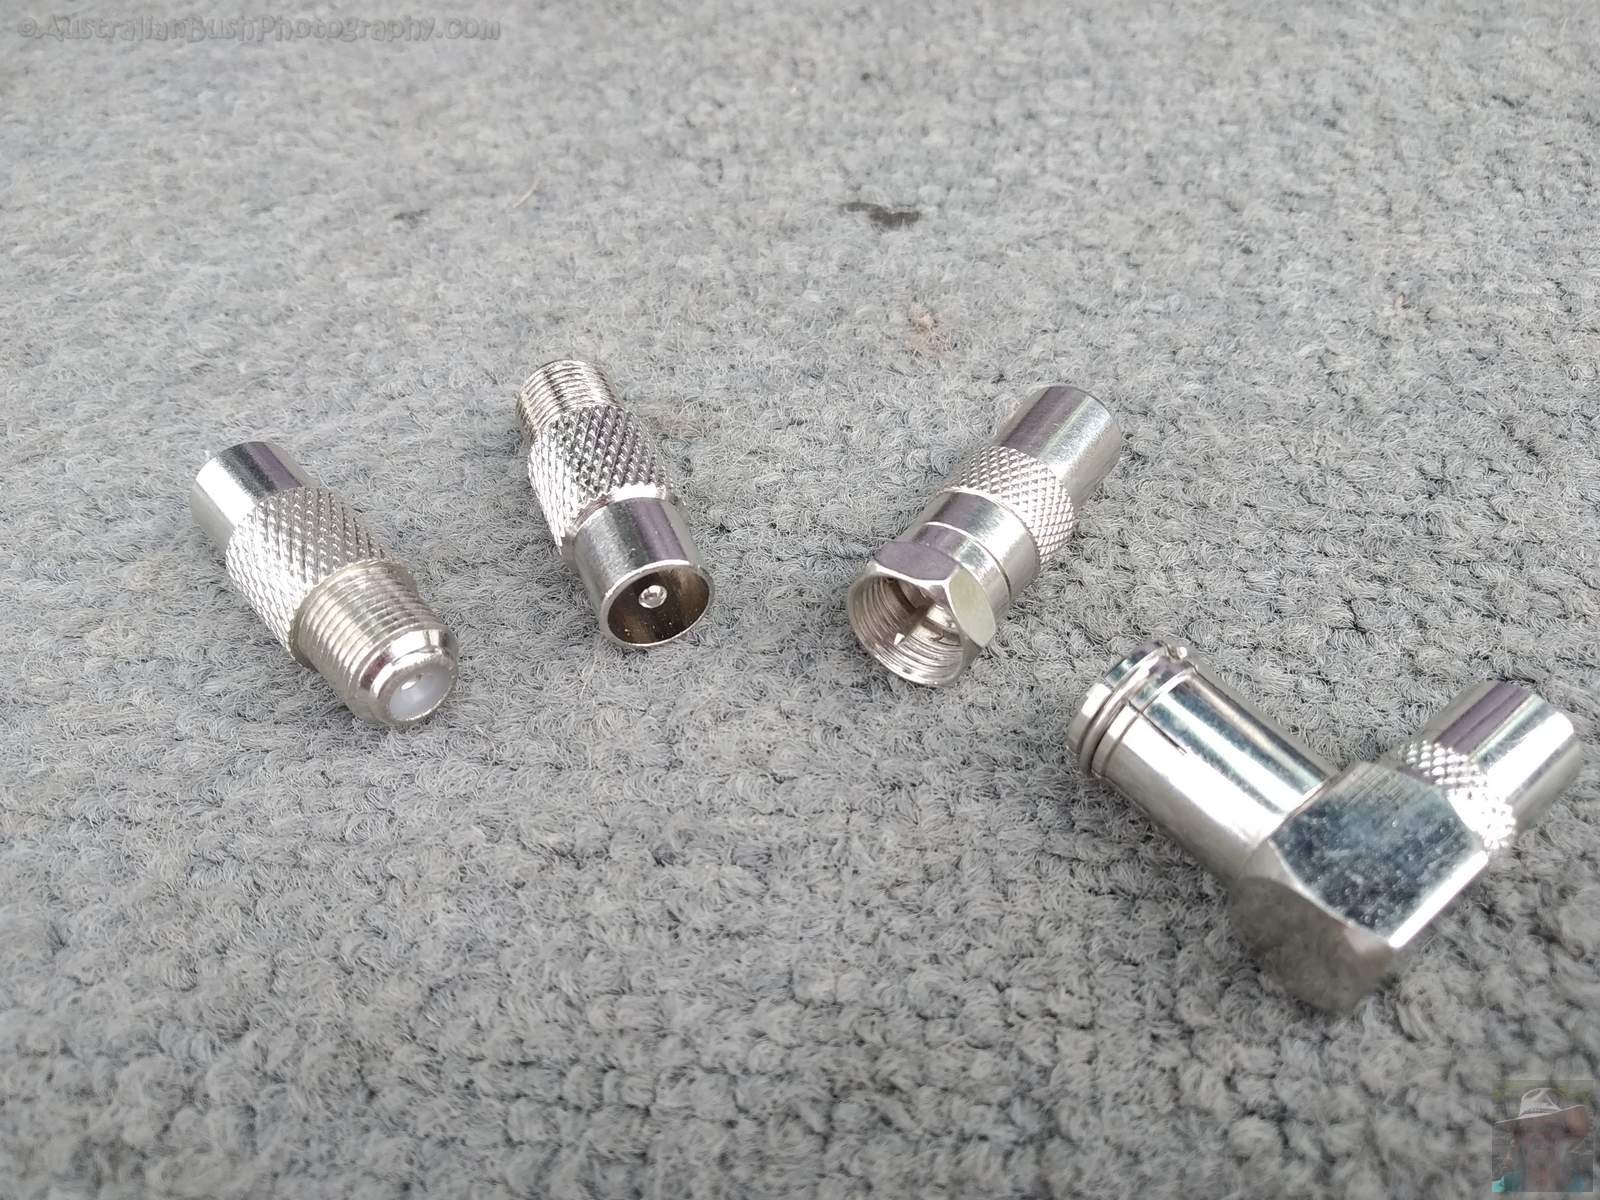
Connecting the signal finder: Your complete kit should have a long co-axial cable for connecting the RV to the dish and one or two short “fly lead” cables. You will need one permanently connected inside the van between the dish (through wall) connection point and the decoder and a second one between the dish and the signal finder for the easiest setup. Using the Satking 3200 you can use the main (long) cable which goes to the van as you don’t need the decoder connected in order to align the dish. These cables are usually terminated with “F type” screw on connectors and these can be inconvenient for quick and easy setup; I have converted all of mine to the “older” PAL connectors as used on the back of TV sets by means of a set of adaptors.I have also fitted a 90 degree connector on the outside of the van as my connector is behind the door and it is much easier if the cable comes straight up from the ground. These adapters are all available (for about $4 each) from Jaycar and their main agents and some other component suppliers. You will have to re tighten them from time to time, the only drawback of using these, but a quick “nip” with a pair of pointed nosed pliers does the trick.
Note: some signal finders require you to connect the cable from your decoder in order to provide power to the device or use an external power source; the SK3200 is a self-contained rechargeable device and does not require this.
Now with the Signal Finder connected you can use the adjustment techinques described above to accurately align the dish and enjoy your viewing.
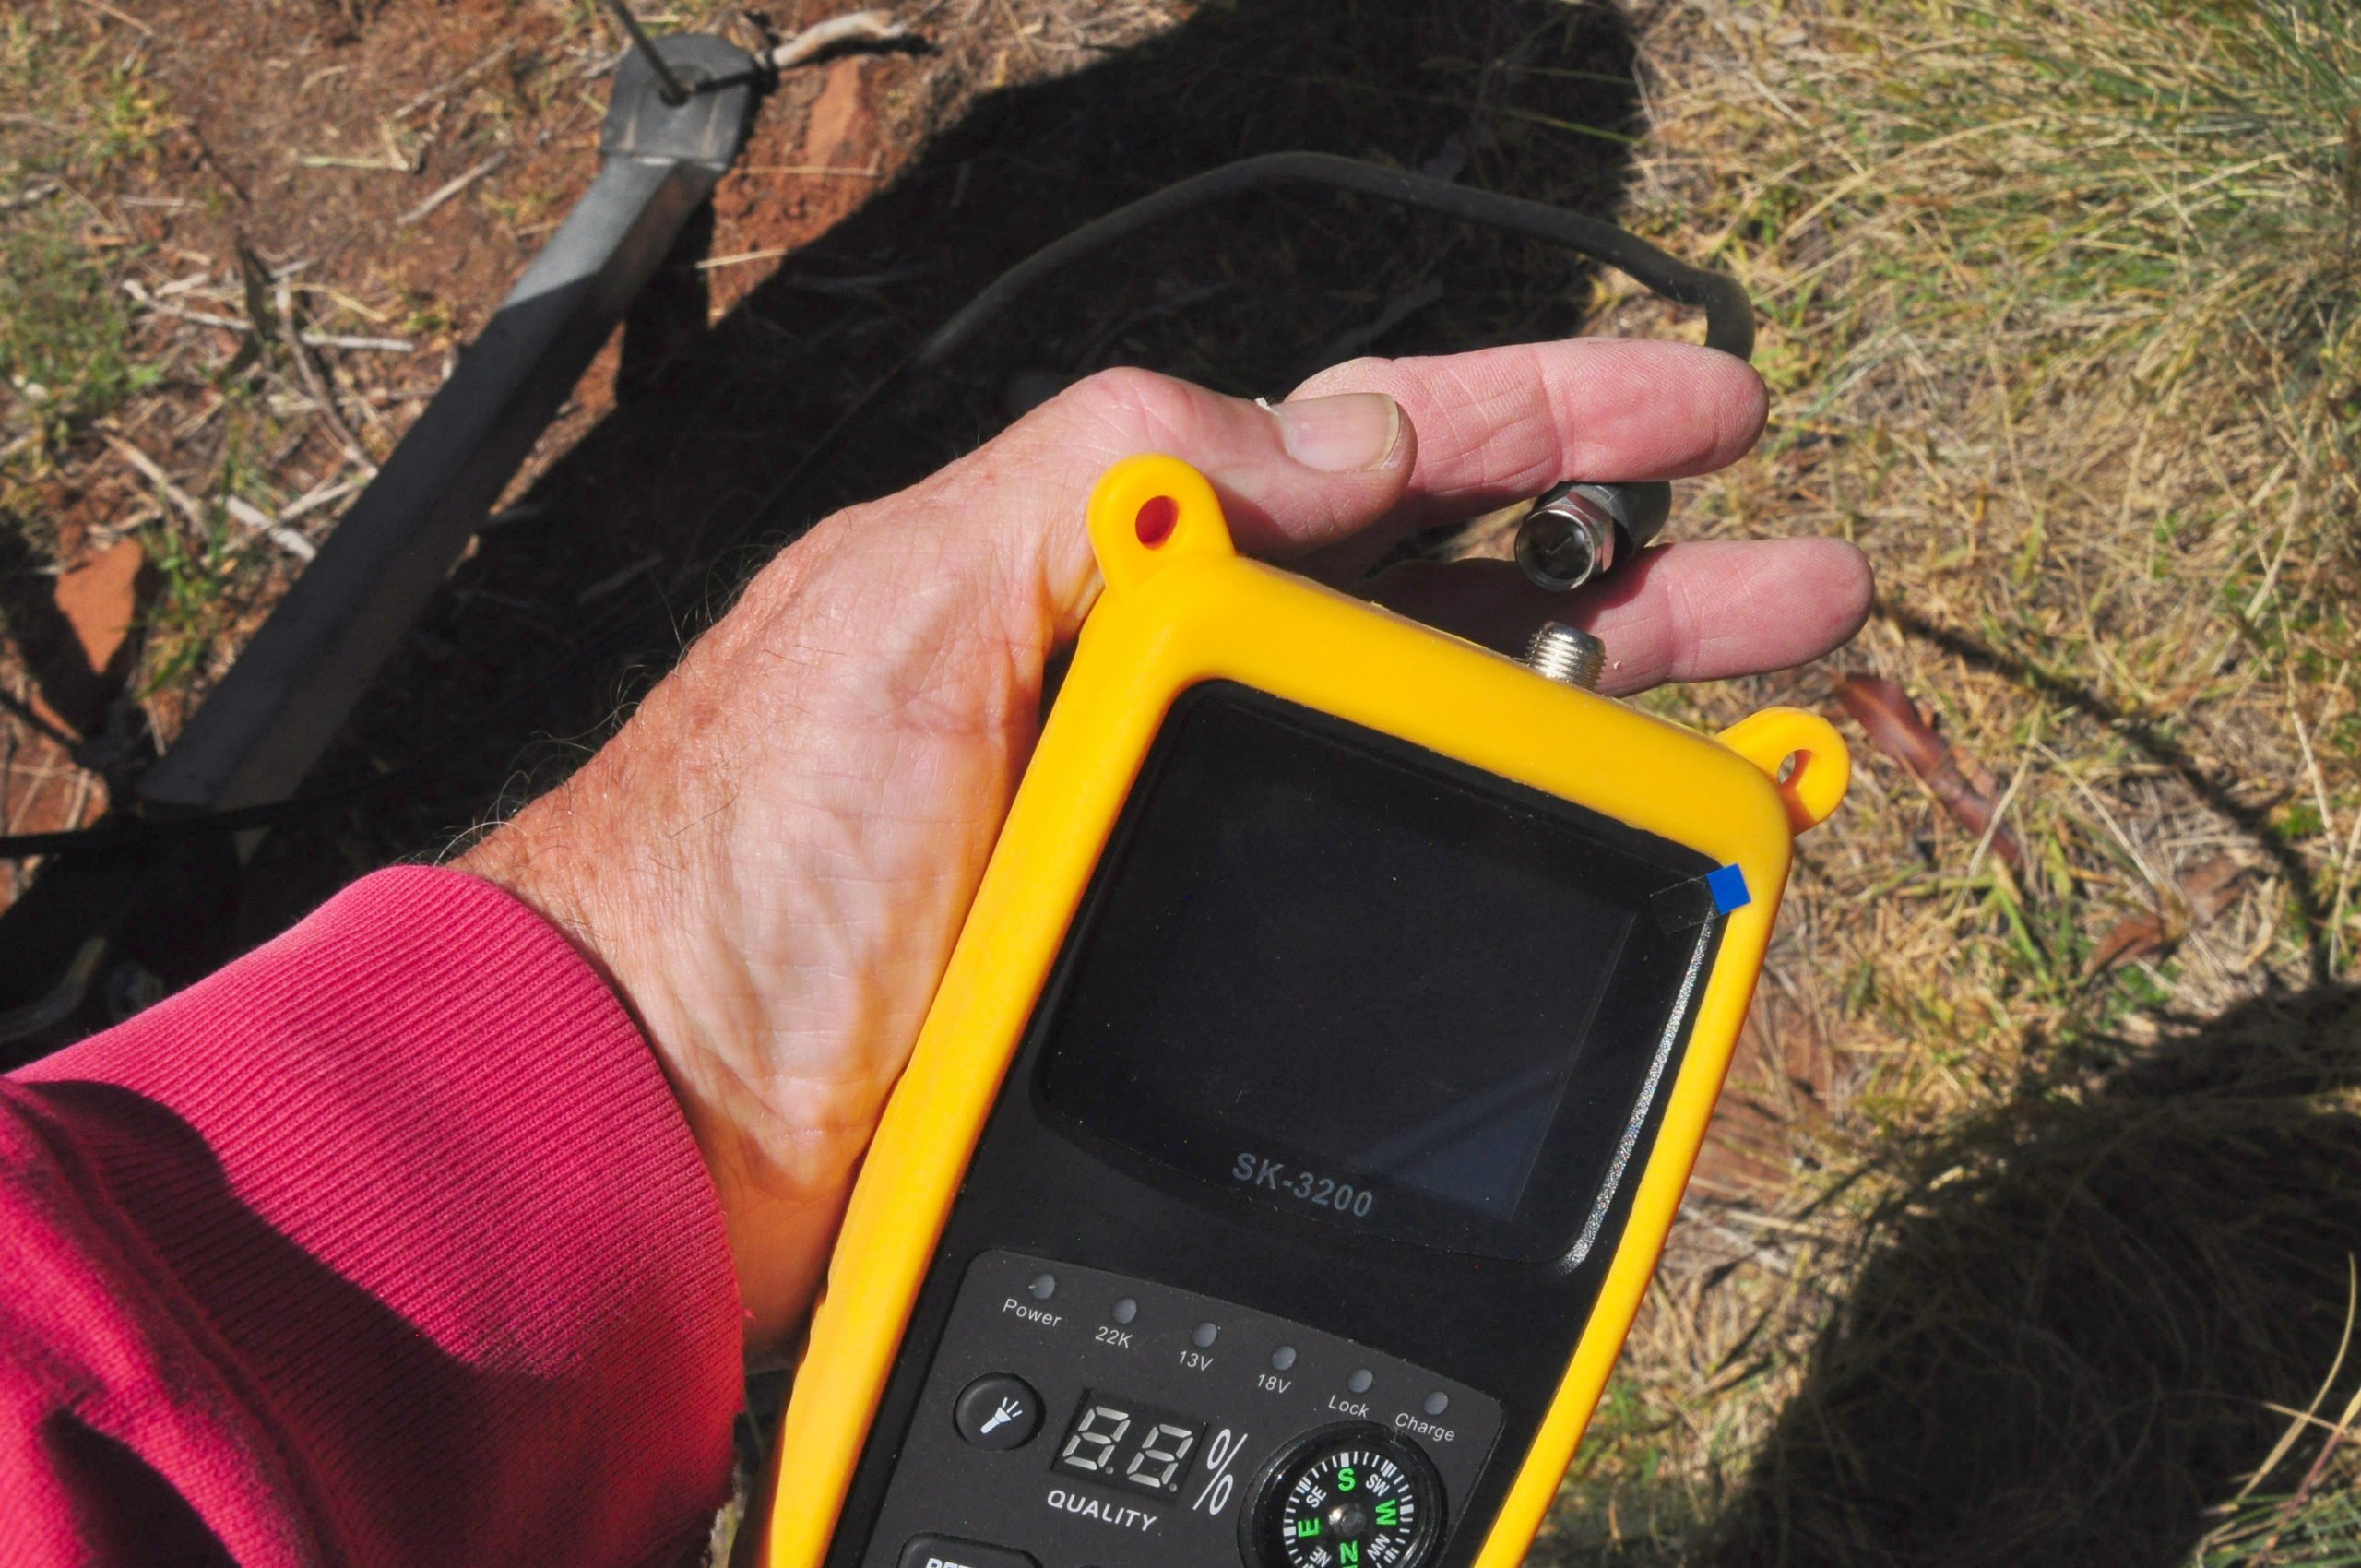
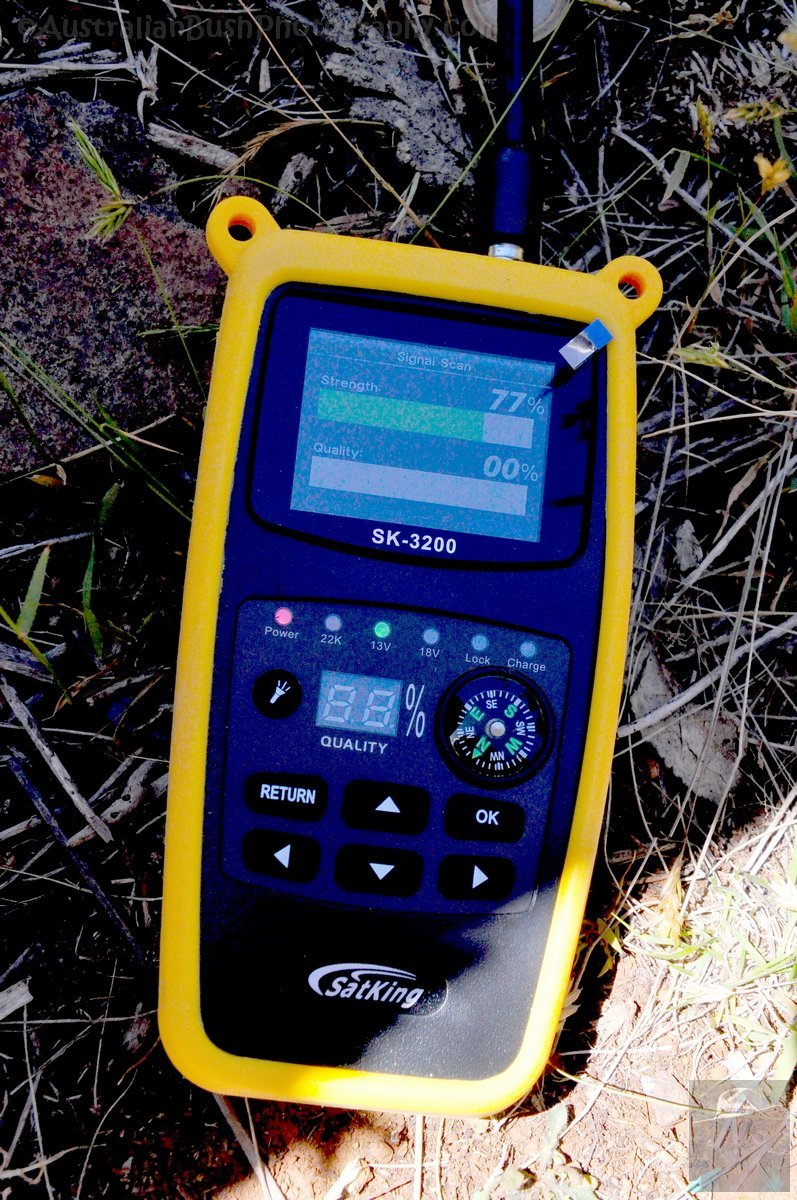

When your signal finder is connected you will get your first “reading”, here showing 77% signal strength but no quality; you will get some signal strength in any position and power lines can give some quite high readings. The only guide that strength alone gives you is when you are moving too far in the wrong direction and the reading drops. If starting from no previous settings of the dish on it’s bracket just rely on the App being accurate and point the dish in the exact indicated direction. From here start adjusting the elevation (up and down) until you get the beginnings of a quality reading then fine tune as described above by small adjustments of the elevation (and azimuth if necessary).
I want to emphasise here the huge difference I have found using the SK3200; the other products have a small delay in responding to a change in position of the dish and this can be both frustrating and confusing, the SK3200 has no detectable “lag” and the change in reading is instant which results in a more accurate and quicker setup.
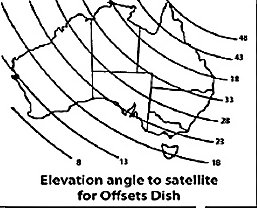
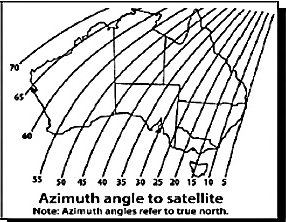
These four diagrams provide the information for all the “dimensions” of dish alignment; Elevation, Azimuth, Skew and the Magnetic Variation which affects the Azimuth setting.

Geographic Location Variance – A Note:
Without getting too technical here there are some differences in the strength of the available received signal from the satellite represented in this illustration. The higher numbers equals “more” signal, the lower number equals less. Some organisations have produced “coverage maps” using this data as the baseline and while there is some validity in these I believe that an awareness of the differences will simply help understand why you will not achieve an equally high quality in all locations.
Articles in this Series:
Part 1 – Do I Need It
Part 2 – What Do I Need?
Part 3 – Making It Work
Part 4 – Satfinder Android App
Part 5 – Troubleshooting
Using the old pal plug at the frequencies of the signal out of your LNB are way to lossy. Remember we are playing with a signal around 1.4 Gig’s . And the reason why ‘F’ type connectors are used, same with the screw on ‘F’ connectors. Cheap, but the proper way is to use a crimp type connector.
Thanks for the comment Stephen, I take your reasoning and fully understand they are lossy, I worked in the radiocomms industry for 20 years but I always have more than enough signal and quality so it is never a problem in reality and far quicker to setup as well as ending the problems of using F connectors continuously, they are not very durable in constant mobile use. I can easily remove any pair of PAL and use the F type if needed but in over 3 years that has never been necessary. I will leave the comment and my reply so that others can make their own call.